RescueLife
Brief
To create a significant Internet influenced production that should be innovative in its approach and placed within a critical context.

Design Process
In order to create this project as efficiently as possible I wanted to follow an existing design methodology. During Netscapes we based our projects off the Design thinking methodology with helped us as a team to work to a structure.
There are 5 stages to design thinking:
- Empathising: Understanding the human needs involved.
- Defining: Re-framing and defining the problem in human-centric ways.
- Ideating: Creating many ideas in ideation sessions.
- Prototyping: Adopting a hands-on approach in prototyping.
- Testing: Developing a testable prototype/solution to the problem.
Empathising and Ideation
In order to determine the nature and purpose of my final project, I wanted to identify the problem I was trying to solve.
We had completed such a variety of modules over the last 3 years, and with added experience of my placement year, I understand where my strengths lie. I have a particular passion for design, and creating but I also really enjoy the back end processes involved with creating a functioning web application. At this point I feel confident that my final year project will be a full-stack web application so show off all the skills I have acquired over the duration of my time at university.


For the focus of my project in particular, I knew I wanted it to be based around something that interests me. After some brainstorming I felt there was a gap in the market around making the process of finding the perfect rescue pet easier.
Problem Statment:
Currently the process for an owner identifying an appropriate pet to adopt is both long and difficult, due to many inconsistencies between rescue shelter and sites.
I settled on the idea of a site dedicated to collating data of rescue pets looking for new homes and displaying it in one easy to use place. Combined with the ability to follow pets from abandoned to rescued, allows for a ‘rescue pet’ social media.
Initial research
- An estimated 2.7 million animals enter UK animal shelters each year. Of these, 1.2 million are cats, 664,000 are dogs, and 184,000 are other animals
- The number of stray cats and dogs arriving at shelters in the United Kingdom has increased by 6% over the last ten years.
- Over 50% of dogs entering UK animal shelters are not spayed or neutered. As a result, over 2 million puppies are born every year, and 600,000 of them will die before their first birthday.
- Animal shelters in the UK euthanise over 200,000 animals every year.
- Of all pets that enter UK animal shelters, only 11% are reunited with their owners.
- On average, it takes an animal shelter four days to become full.
- Animal shelters receive more than 80,000 calls a year from people looking for a pet to adopt
Source: PetKeen
From these stats alone we can see there in much need for improvement in this field. Personally I have gone through both the process of finding a pet to adopt and finding a pet to buy. It is very obvious to see that buying a pet is significantly easier than adopting one. In order to understand why this is the case it’s important to understand the different ways in which you can get a pet.
1. Buying from a breeder
Buying from a breeder is typically the most responsible way to buy a pet if you are looking for something very specific. Despite the well know phrase of ‘adopt don’t shop’ which encourages people to adopt pets rather than buying them, I believe there is still value in buying a pet from a reputable breeder, especially if you are looking for something very specific in temperament or characteristics. Kennel Club registered dog breeders will often provide the following:
- Your puppy’s pedigree (family tree)
- Details about your puppy’s microchip
- Information about your puppy’s vaccination and worming treatments
- Copies of health certificates regarding the puppy’s mother and father
- socialisation, exercise and training information
- information about the breed, including advice on grooming
- feeding advice
- worming regime (when puppy was last wormed, product used and when next worming is due)
- immunisation regime (what vaccinations, if any, have been done or which vaccines are recommended)
Source: The Kennel Club

2. Backyard breeders/ puppy Mills
Small scale backyard breeders or large scale puppy mills are the often worst way to buy a pet. This is due to their server lack of welfare standards, keeping animals in terrible conditions often seeing them only for their monetary value. The breeders typically sell their pets for pedigree prices despite the terrible health conditions. These animals never see a vet and often succumb to horrible illnesses or disease, which them quickly spreads from animal to animal due to the cramped conditions and lack of basic hygiene.
Source: Belle of the Ball Foundation
- There are an estimated 10,000 puppy mills in the United States.
- Over 2 million puppies bred in mills each year.
Source: The Puppy Mill Project
3. Rescue Shelters
Adopting a pet from a rescue shelter is arguably the most moral way of obtaining a pet. Despite there being less choice on the owner end, providing a home for an animal in need can be incredibly rewarding.
Adoption in reference to a pet is defined as “the act or process of acquiring a pet, especially a stray or abandoned animal from an animal rescue organization” . However, words such as ‘adoption’ and ‘rescue’ can often be misleading. As seen in 2012 when a supposed rescue shelter named “Paws, Claws and More” turned out to be a puppy mill (Barton, 2013). Therefore, truly rescuing a pet for a genuine shelter my require owners to be more thorough and patient in their searches but it is most often seen as the most moral way in which to acquire a pet.

Solution
A web application dedicated to collating data of rescue pets looking for new homes and displaying it in one easy to use place. Combined with the ability to follow the progress of the animals, as a ‘rescue pet’ social media. Which will raise more awareness for pets that desperately need homes.
buying pet example – https://www.trustedpups.com/litters/test-litter-ua11ruwa
My Proposal
My project will be a web application dedicated to matching owners with rescue pets, and then updating their new companions progress on the social portion of the application. The project will therefore consist of two elements: The rescue pet listings which will be drawn from other rescue sites, either by API or manually inputted by the external rescues as a form of advertising to reach a wider audience. And the Social media element, where users can follow the progress of rescue animals in a social media for pets. The rescues would have an account with all of their pets as assets linked to the account, when the pet is adopted (all process externality) the rescue passes ownership of the asset/pet to a user. The user/owner can therefore update the timeline of their new companion for others to follow. The human user account would be limited in functionality, only being able to browse and follow pets. The user would be required to have a pet associated with their account to post to the site. User accounts would have a login, and specific content would be tailored to their preferences. I would be using skills learnt from a variety of previous modules such as UI/UX using the skeleton framework and the full-stack module to structure the project such as node.js and handlebars and either mongo DB or firebase to manage the database. I want to further my Full-stack skills, improve my design ability specifically around UI/UX I want to create a functioning and accessible web application. I want to further my understanding of databases particularly mongo DB or firebase depending on which one I choose.
In terms of the projects content I want to create an application which makes the process of finding the perfect rescue pet much easier. Many current rescue websites are outdated and difficult to navigate and I feel like theres a room for a better, well designed platform to build a strong community and positive mind set about rescue pets. I would be using skills learnt from a variety of previous modules such as UI/UX using the skeleton framework and the full-stack module to structure the project such as node.js and handlebars and either mongo DB or firebase to manage the database. The application would be written in HTML, Javascript and CSS.

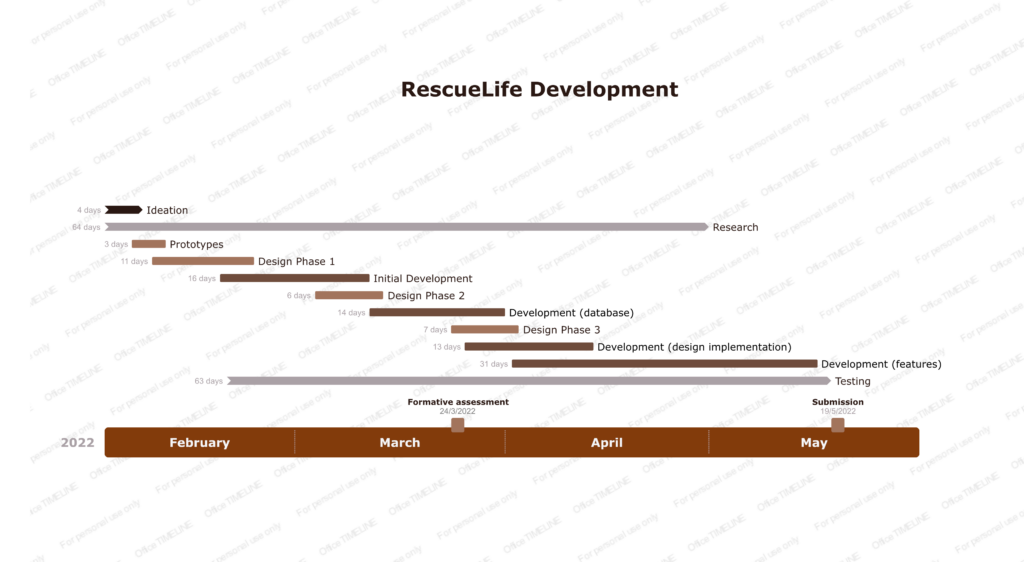
I created a simple gantt chart to give me an outline of what I intended to do and when. I thought this would be helpful with keeping myself on track and limiting how much time I can spend on each section of the project, so I don’t run out of time nearer the end and certain element suffer.
Design
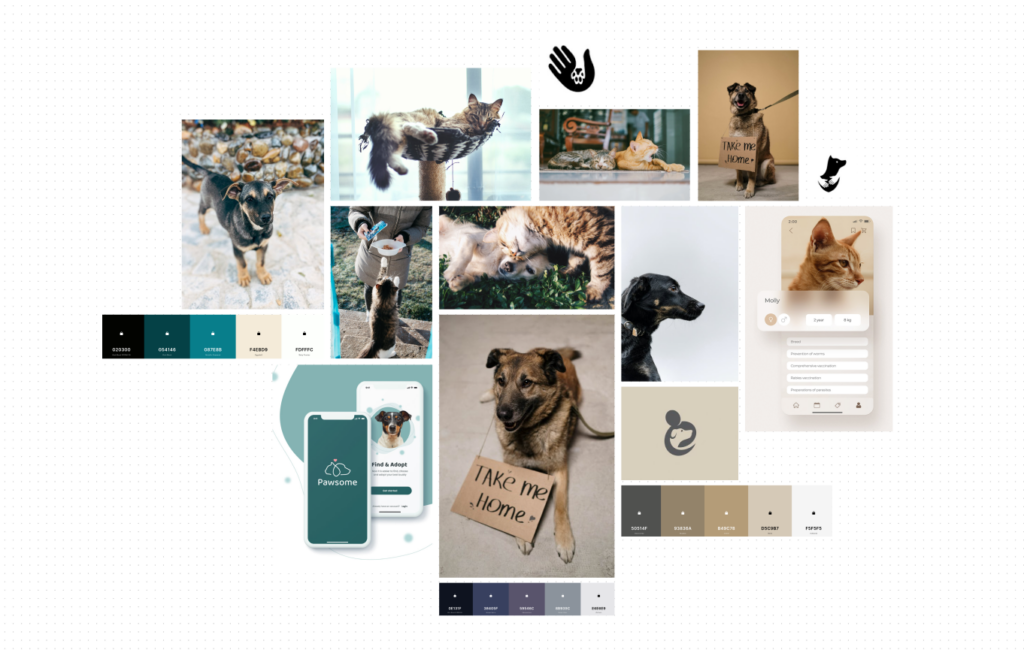
I began the design process by creating a moodboard, this has always been my favourite approach when starting a project. It helps me visualise my ideas and set the feel of the project. From here I can expand on my ideas.
In terms of initial design choices, I wanted to approach the design from quite a neutral angle, as I envisioned the application to be heavily photography based on pets which are typically neutral colours, I wanted a colour scheme to compliment this.
I had created a couple of colour schemes for the moodboard that complimented the images but with the intention of the developing them further into the design stages.
Research – Design
As the purpose of my web application wasn’t just to be a fun and interactive way to follow rescue pets around the world, it has the more critical purpose of find rescue animals much needed homes. It is so important that the design is incredibly user friendly in order to have any impact in helping people find their new pets. Therefore, before I started creating the prototypes, I embarked on some research to ensure my design decisions where based off of research.

Prototyping
I wanted to start prototyping to visualise the structure this project would require. There are a lot fo elements to it so it is very important I keep the design simple and easy to navigate. So initially I wanted the layout to be basic. Once I had an understanding of all the different components I could go in for another round of design which would be a little more ‘outside the box’.
Before I could make a start on the code, I wanted to establish which platform I was going to use to host my database. I did a bit on research and the most popular platforms are currently firebase and Mongo. I had a look at firebase first as I already had a bit of experience with mongo form previous modules.
I found the code behind firebase quite complex, even the instructional videos where clearly targeted to developers with more javascript experience than me so at this point I opted for the safer option of mongo as I had both experience as resources from 2nd year.
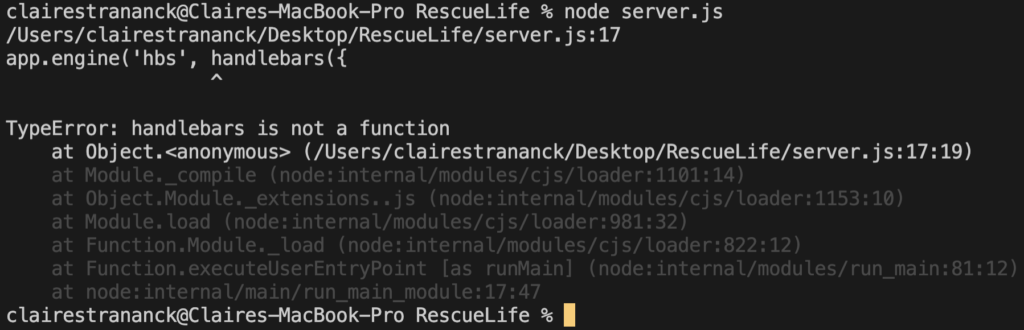

Beginning development
I used the recourses for the full-stack module to guide me though the code. Using handlebars seemed like an appropriate option for my site as there would be a variety of components that would make us each page, and it would ensure I wouldn’t need to spend time editing parts of each page independently such as the headers and footers. Despite feeling confident around using mongoDB and node for this project, there were some elements of the examples that where outdated. For example the handlebars syntax had been updated slightly. where you could previously require express-handlebars into a variable such as ‘handlebars’ and then use that variable as a function, I now had to call the specific part of handlebars to work as a function. This took me a while to conclude as there was little indication anywhere to this new syntax. The solution was to use ‘handlebars.engine’ as the function which has since worked well and alerted me to future problems being related to the now updated syntax.
Design
I began to develop the wireframes into designs and experiment with different styles. I wanted to make the platform fun and engaging but also functional and simple.


Initial experiments with design
This was my initial vision for my application. I wanted to use lots of imagery as there is an abundance of good quality photos of pets. Along side this there is also plenty of research into why we as humans find dogs can cats cute. BBC earth wrote an interesting article about this matter, animals are seen as cute, particularly baby animals likely because they remind us of human children which we often have an instinct to protect and nurture. This is even more predominant in pets, cats in particular as they have been bred over thousands of years to exaggerate the features we find so cute, typically big eyes and small nose.
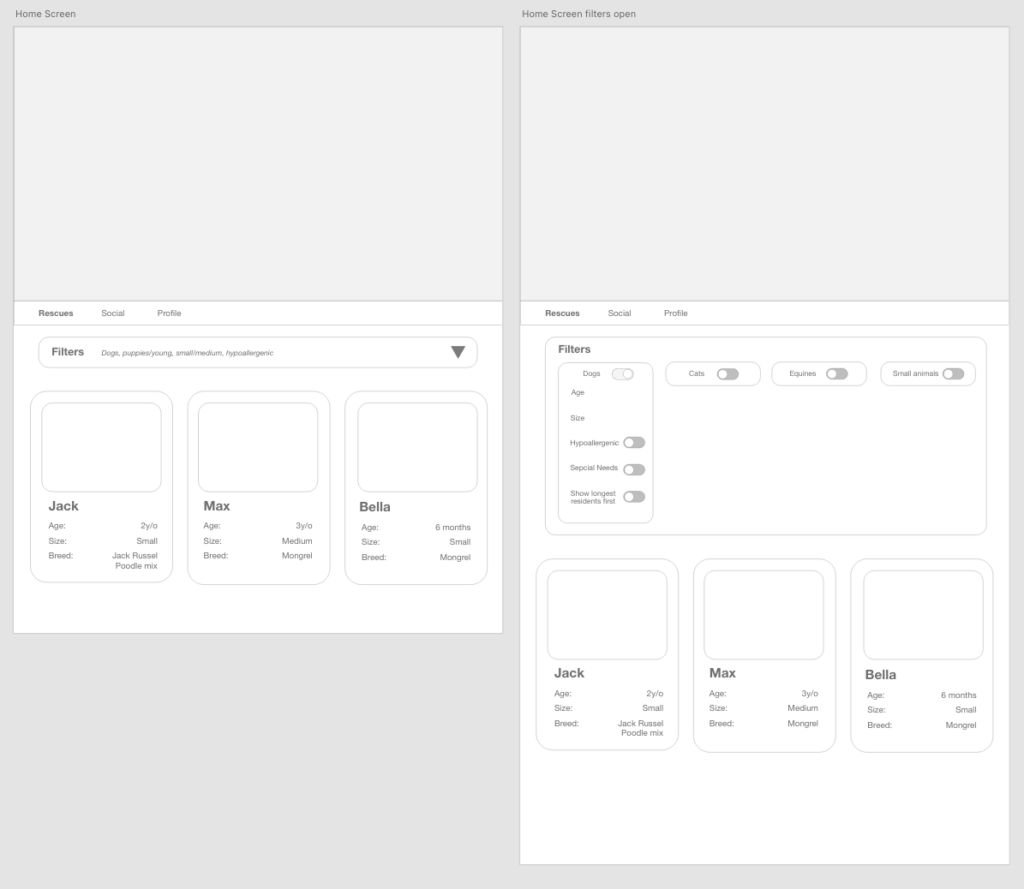
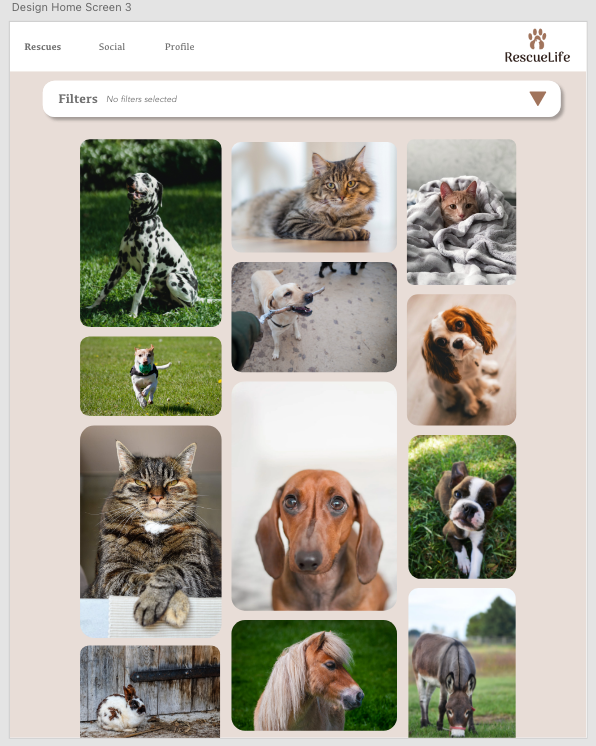
This is a simple design of the dashboard which provides a list of all the rescues in the area. Only providing a few details on each pet gives the user all the initial information they need, while not overwhelming them.
Inspiration
To back up reasons to include lots of imagery in my application I looked at popular brand websites which use industry relevant media. The North Face is a good example, they sell high-performance climbing and backpacking equipment (the North Face) therefore use lots of images of people outdoors. running, exploring, climbing etc, gives a sense of adventure and likely encourage sales.

Another example, arguably one of the most popular websites in terms of design and UX, and one designers often look to for inspiration is the apple website. Despite their products appearing simple by design they get incredibly creative with how they are presented, often offering the user a journey though the site. They make great use of graphics colour and photos to portray not only their products but a sense of the company.

I originally used this image for the header if my first design inspired by the trend just underneath, of a transparent image that is integrated with the header, the cat feels like its sitting in the header rather than it just being an image of a cat. However I felt these images with transparent backgrounds often came across stages and unnatural, there weren’t many unlicensed options available and I didn’t have the time or recourses to create my own images. I did experiment with the idea as you can see in this example the images become very different when there in not context.
In one of these images you get a sense of the contact on the situation, the puppy in happily chasing after a ball the owner has thrown for it it is a pleasant site of dog and owner playing. The second image had been stripped away of the context. It becomes unclear what the puppy is doing and is a much less relatable situation.

Types of images
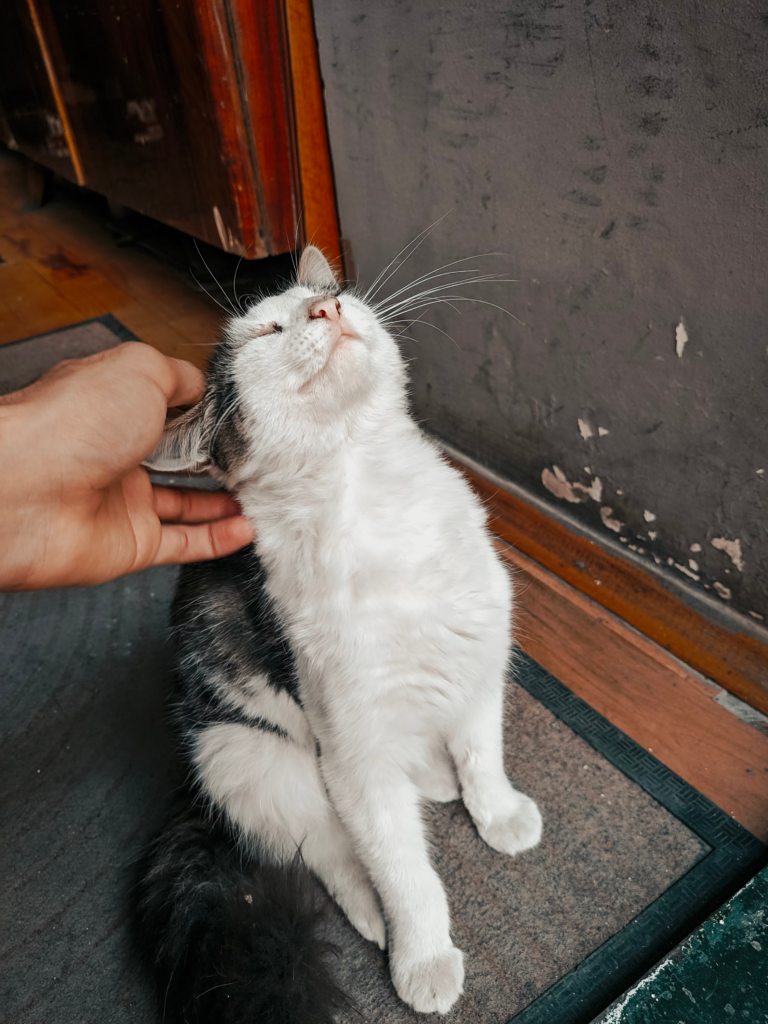
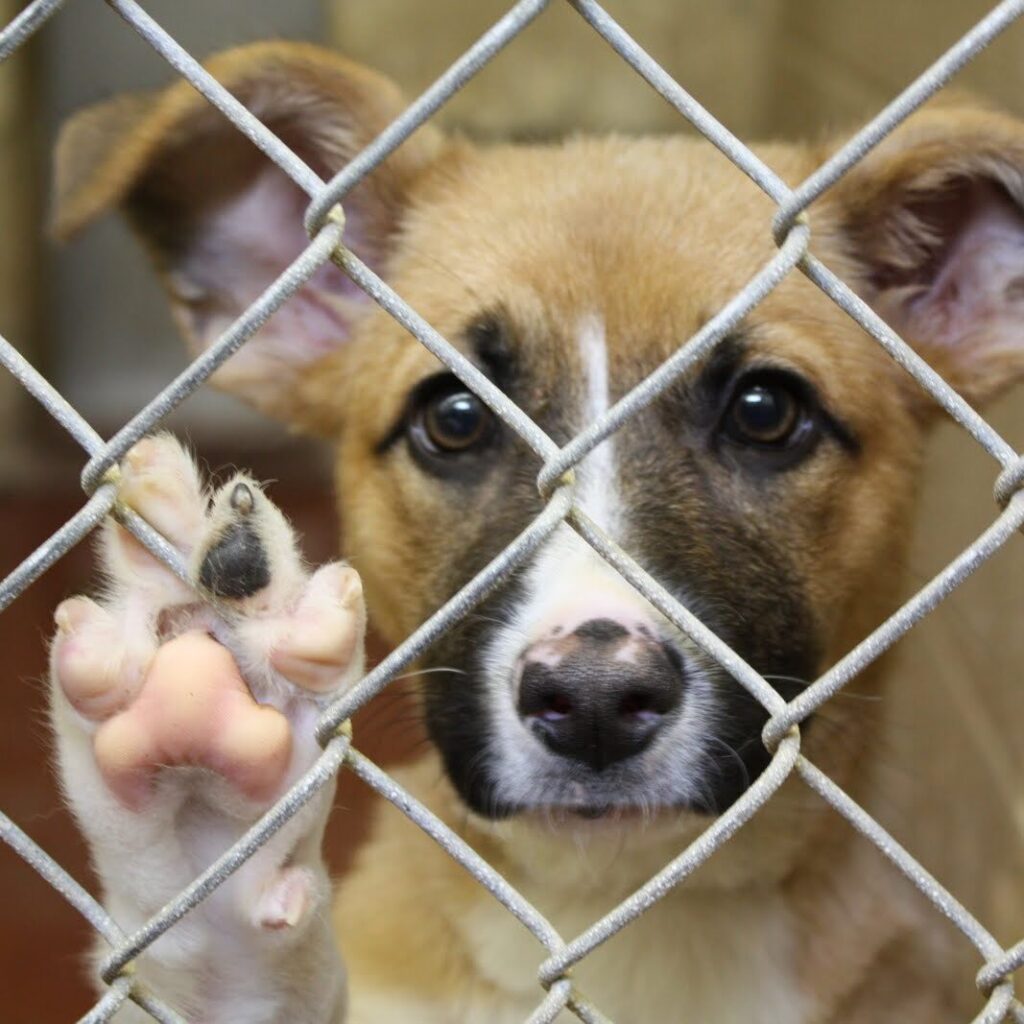
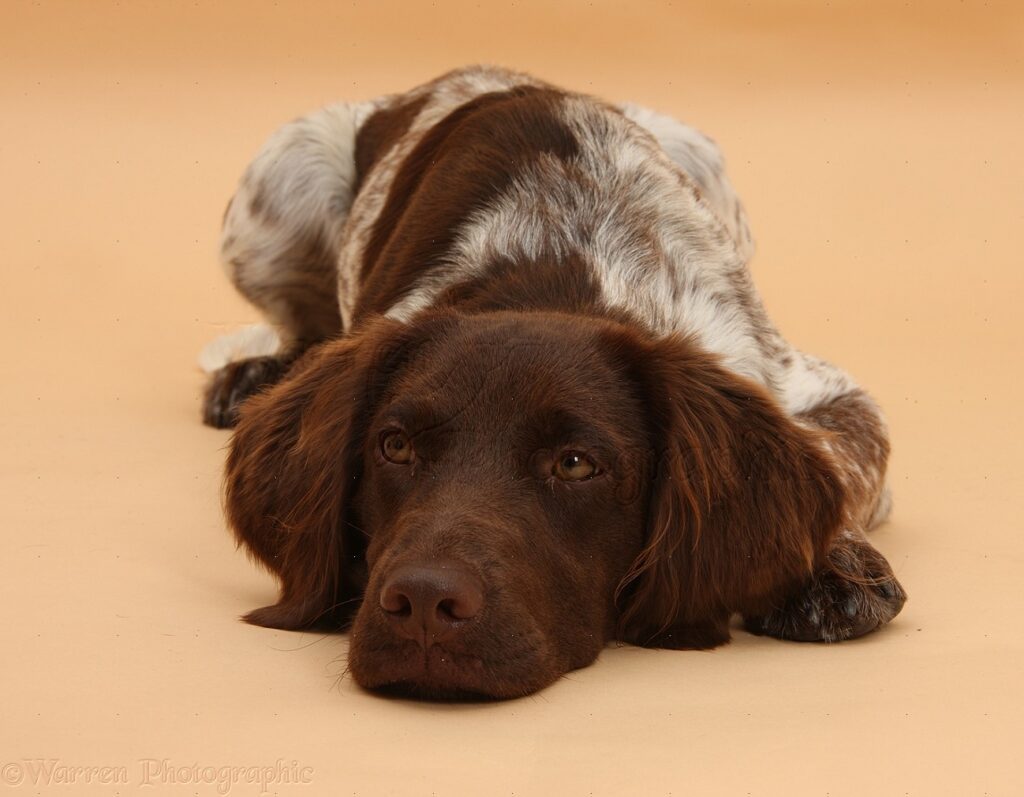
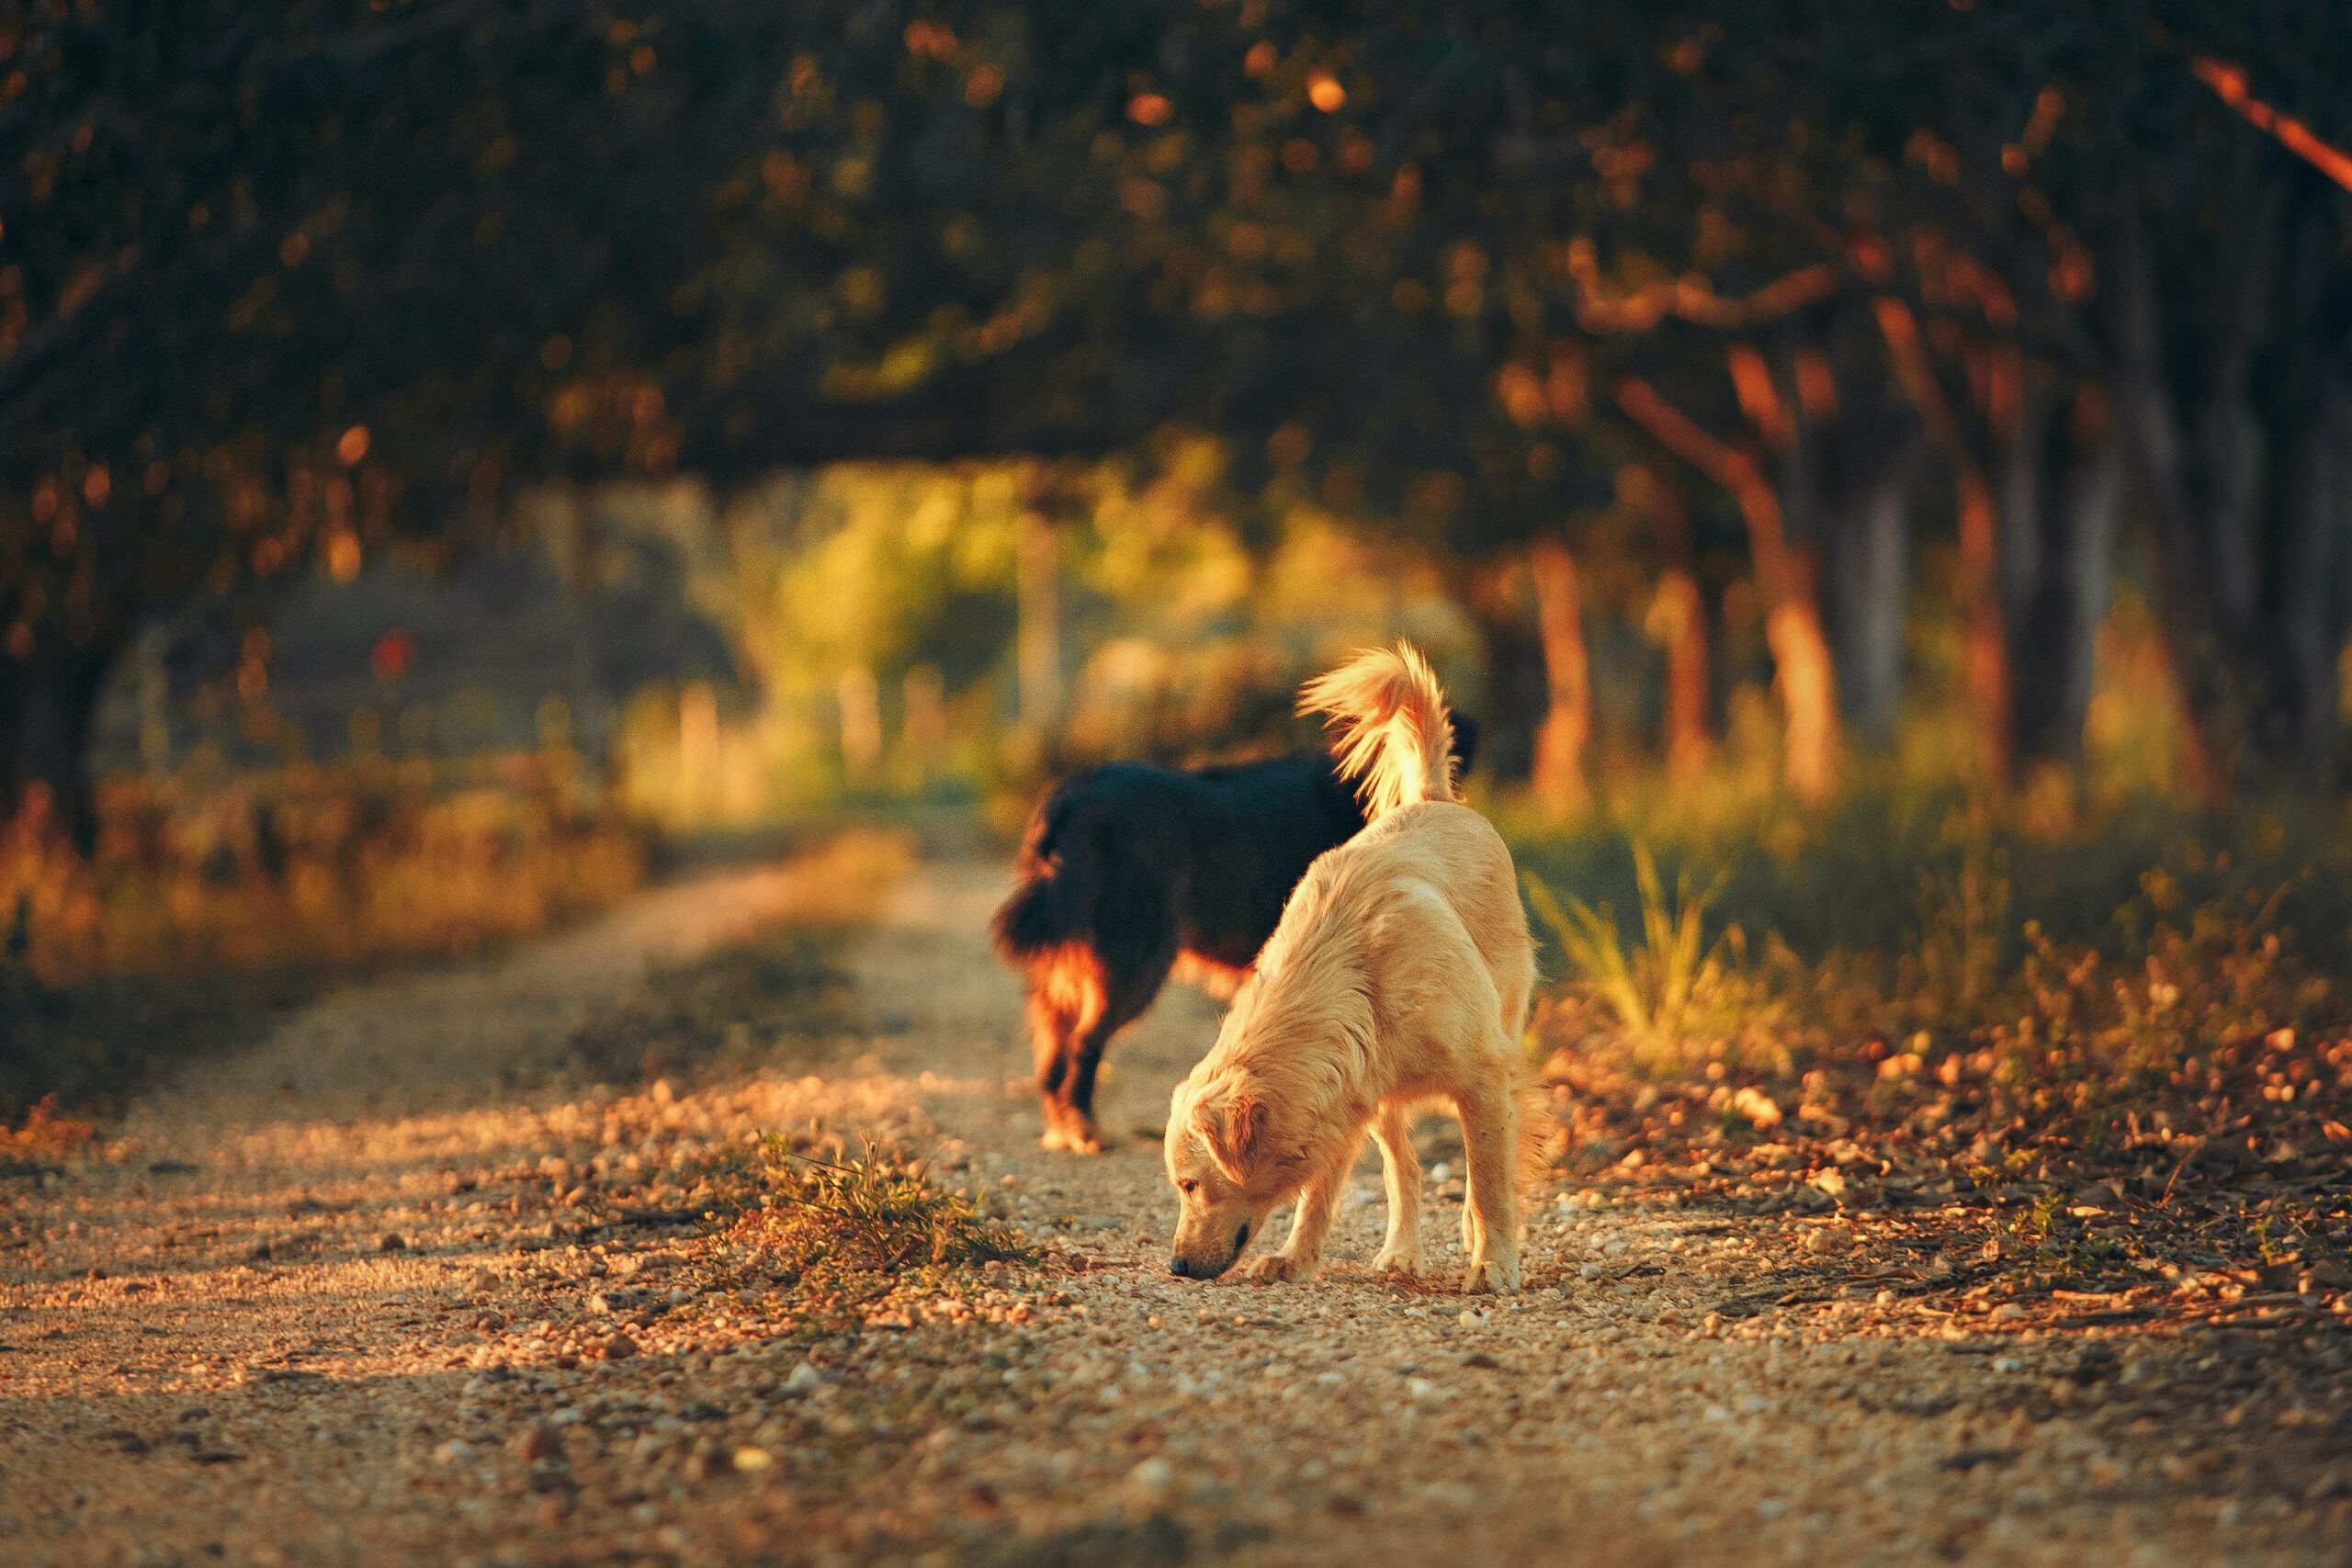
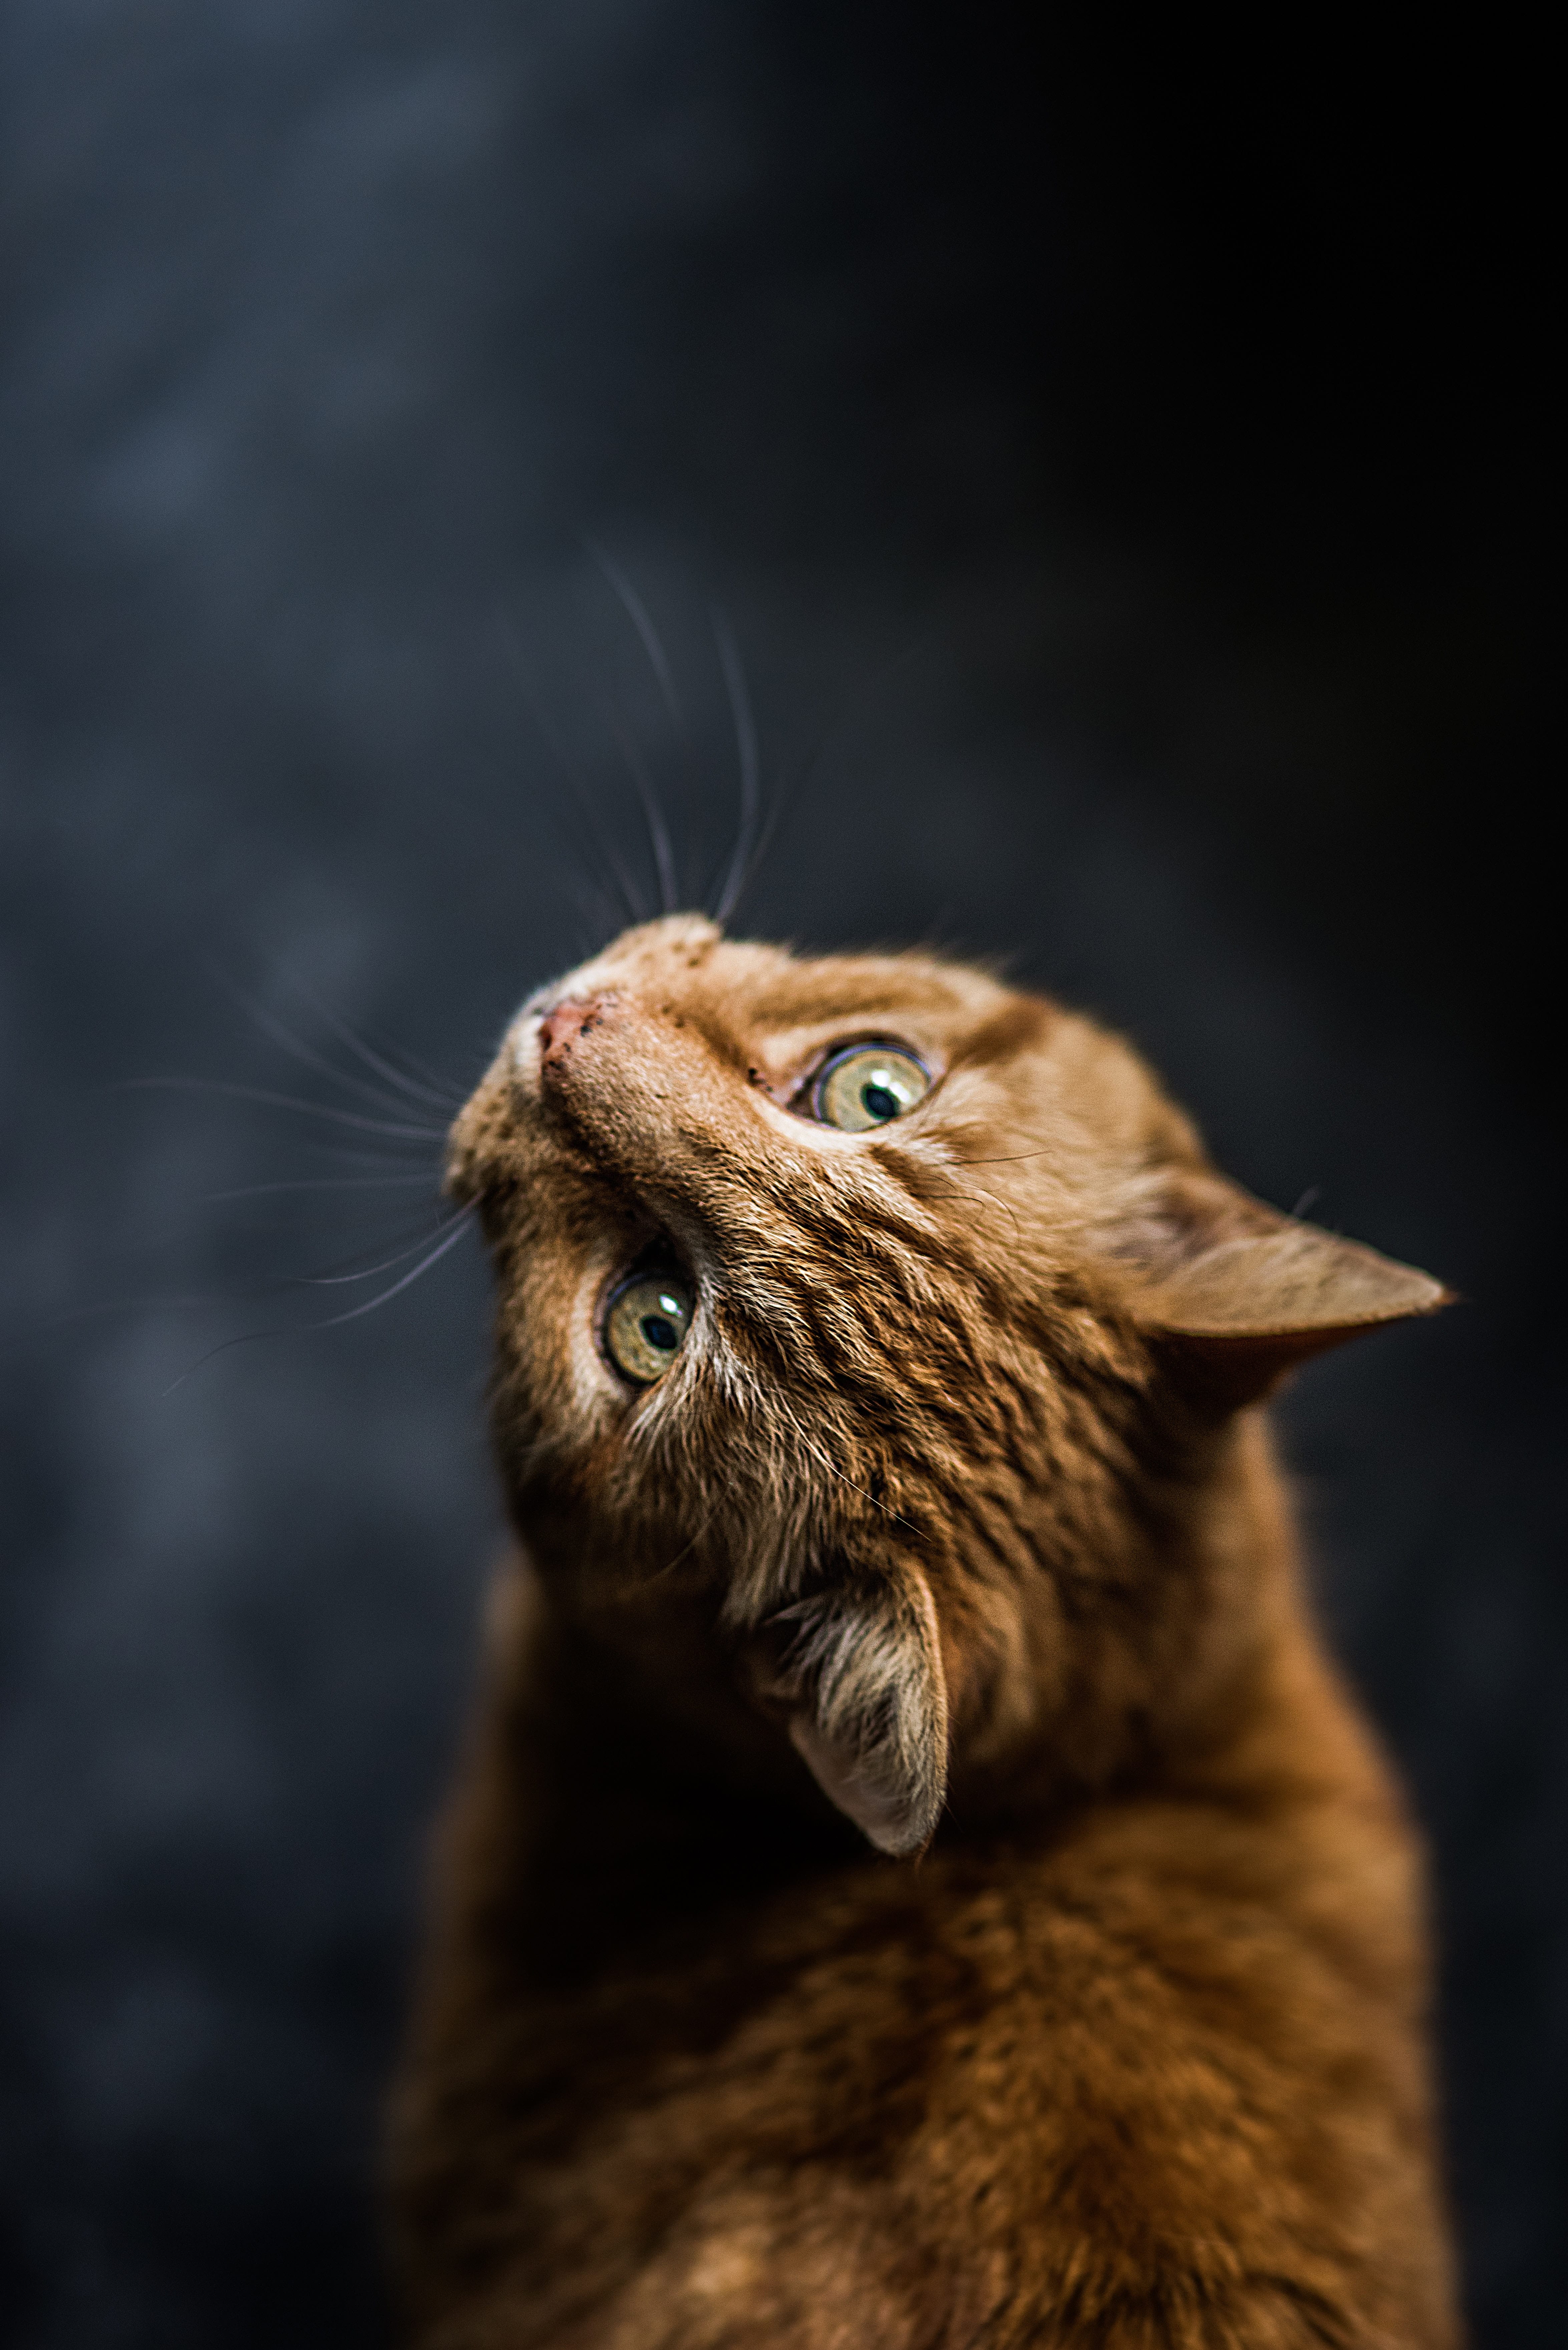
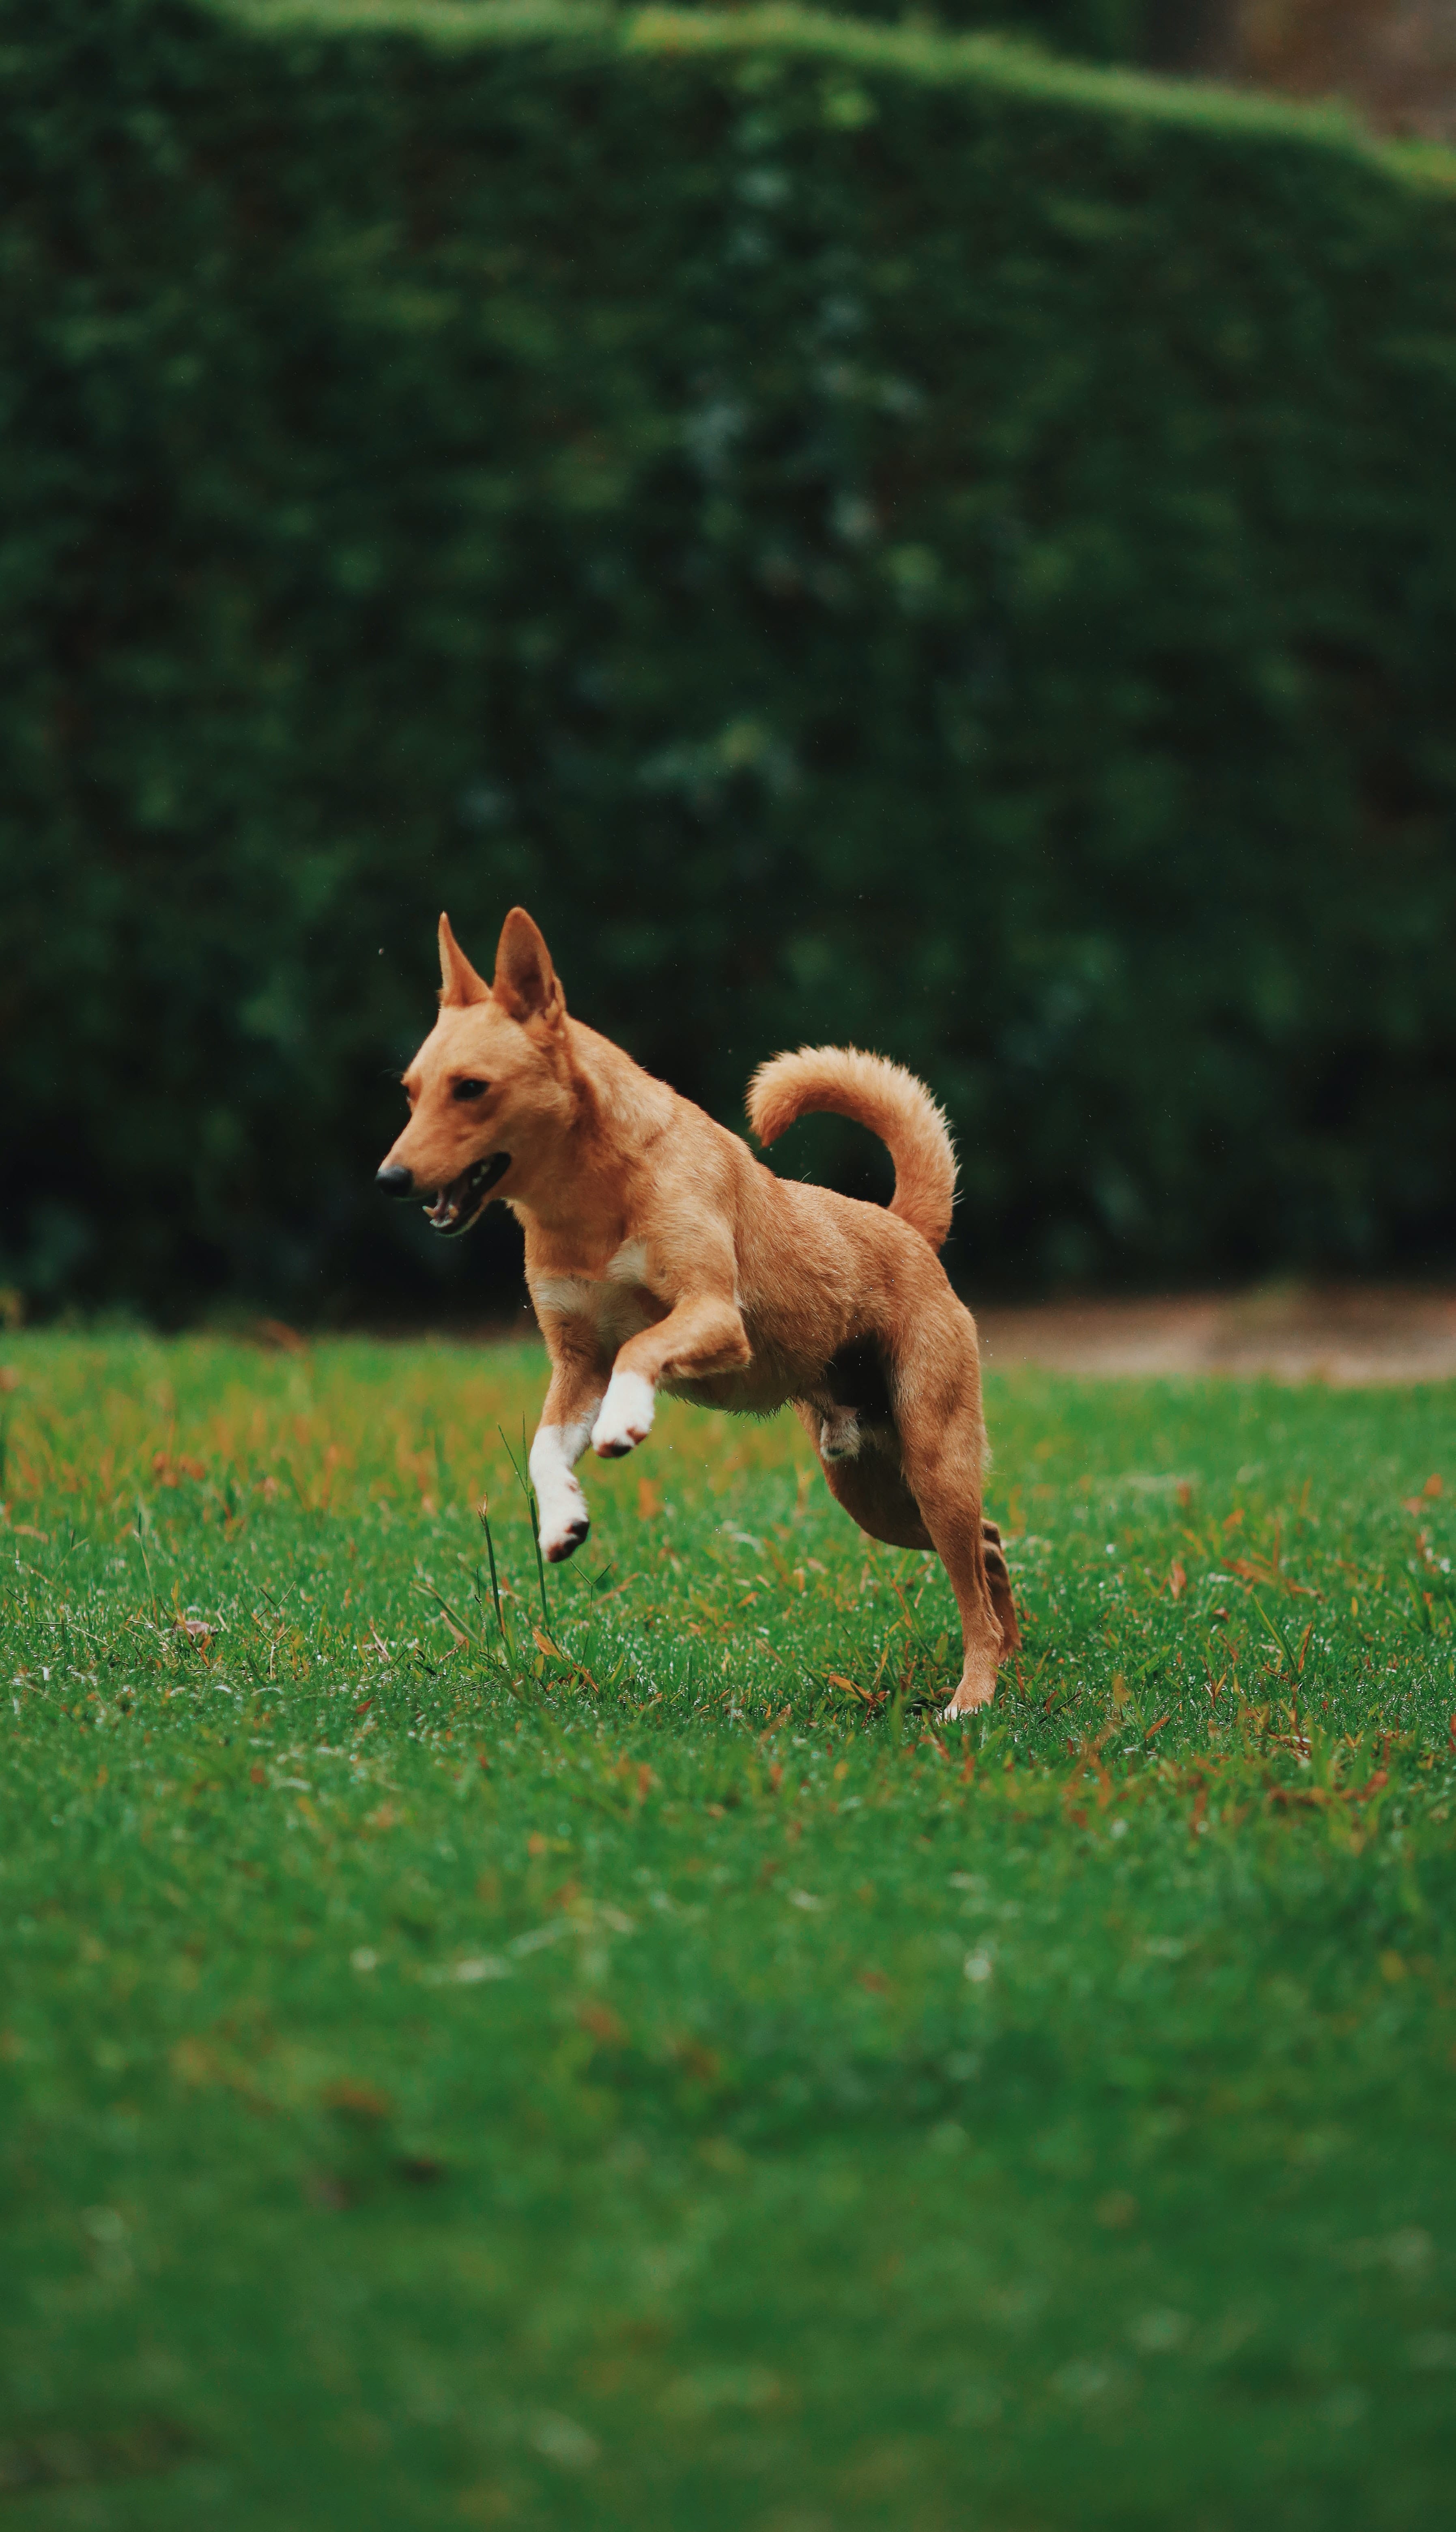
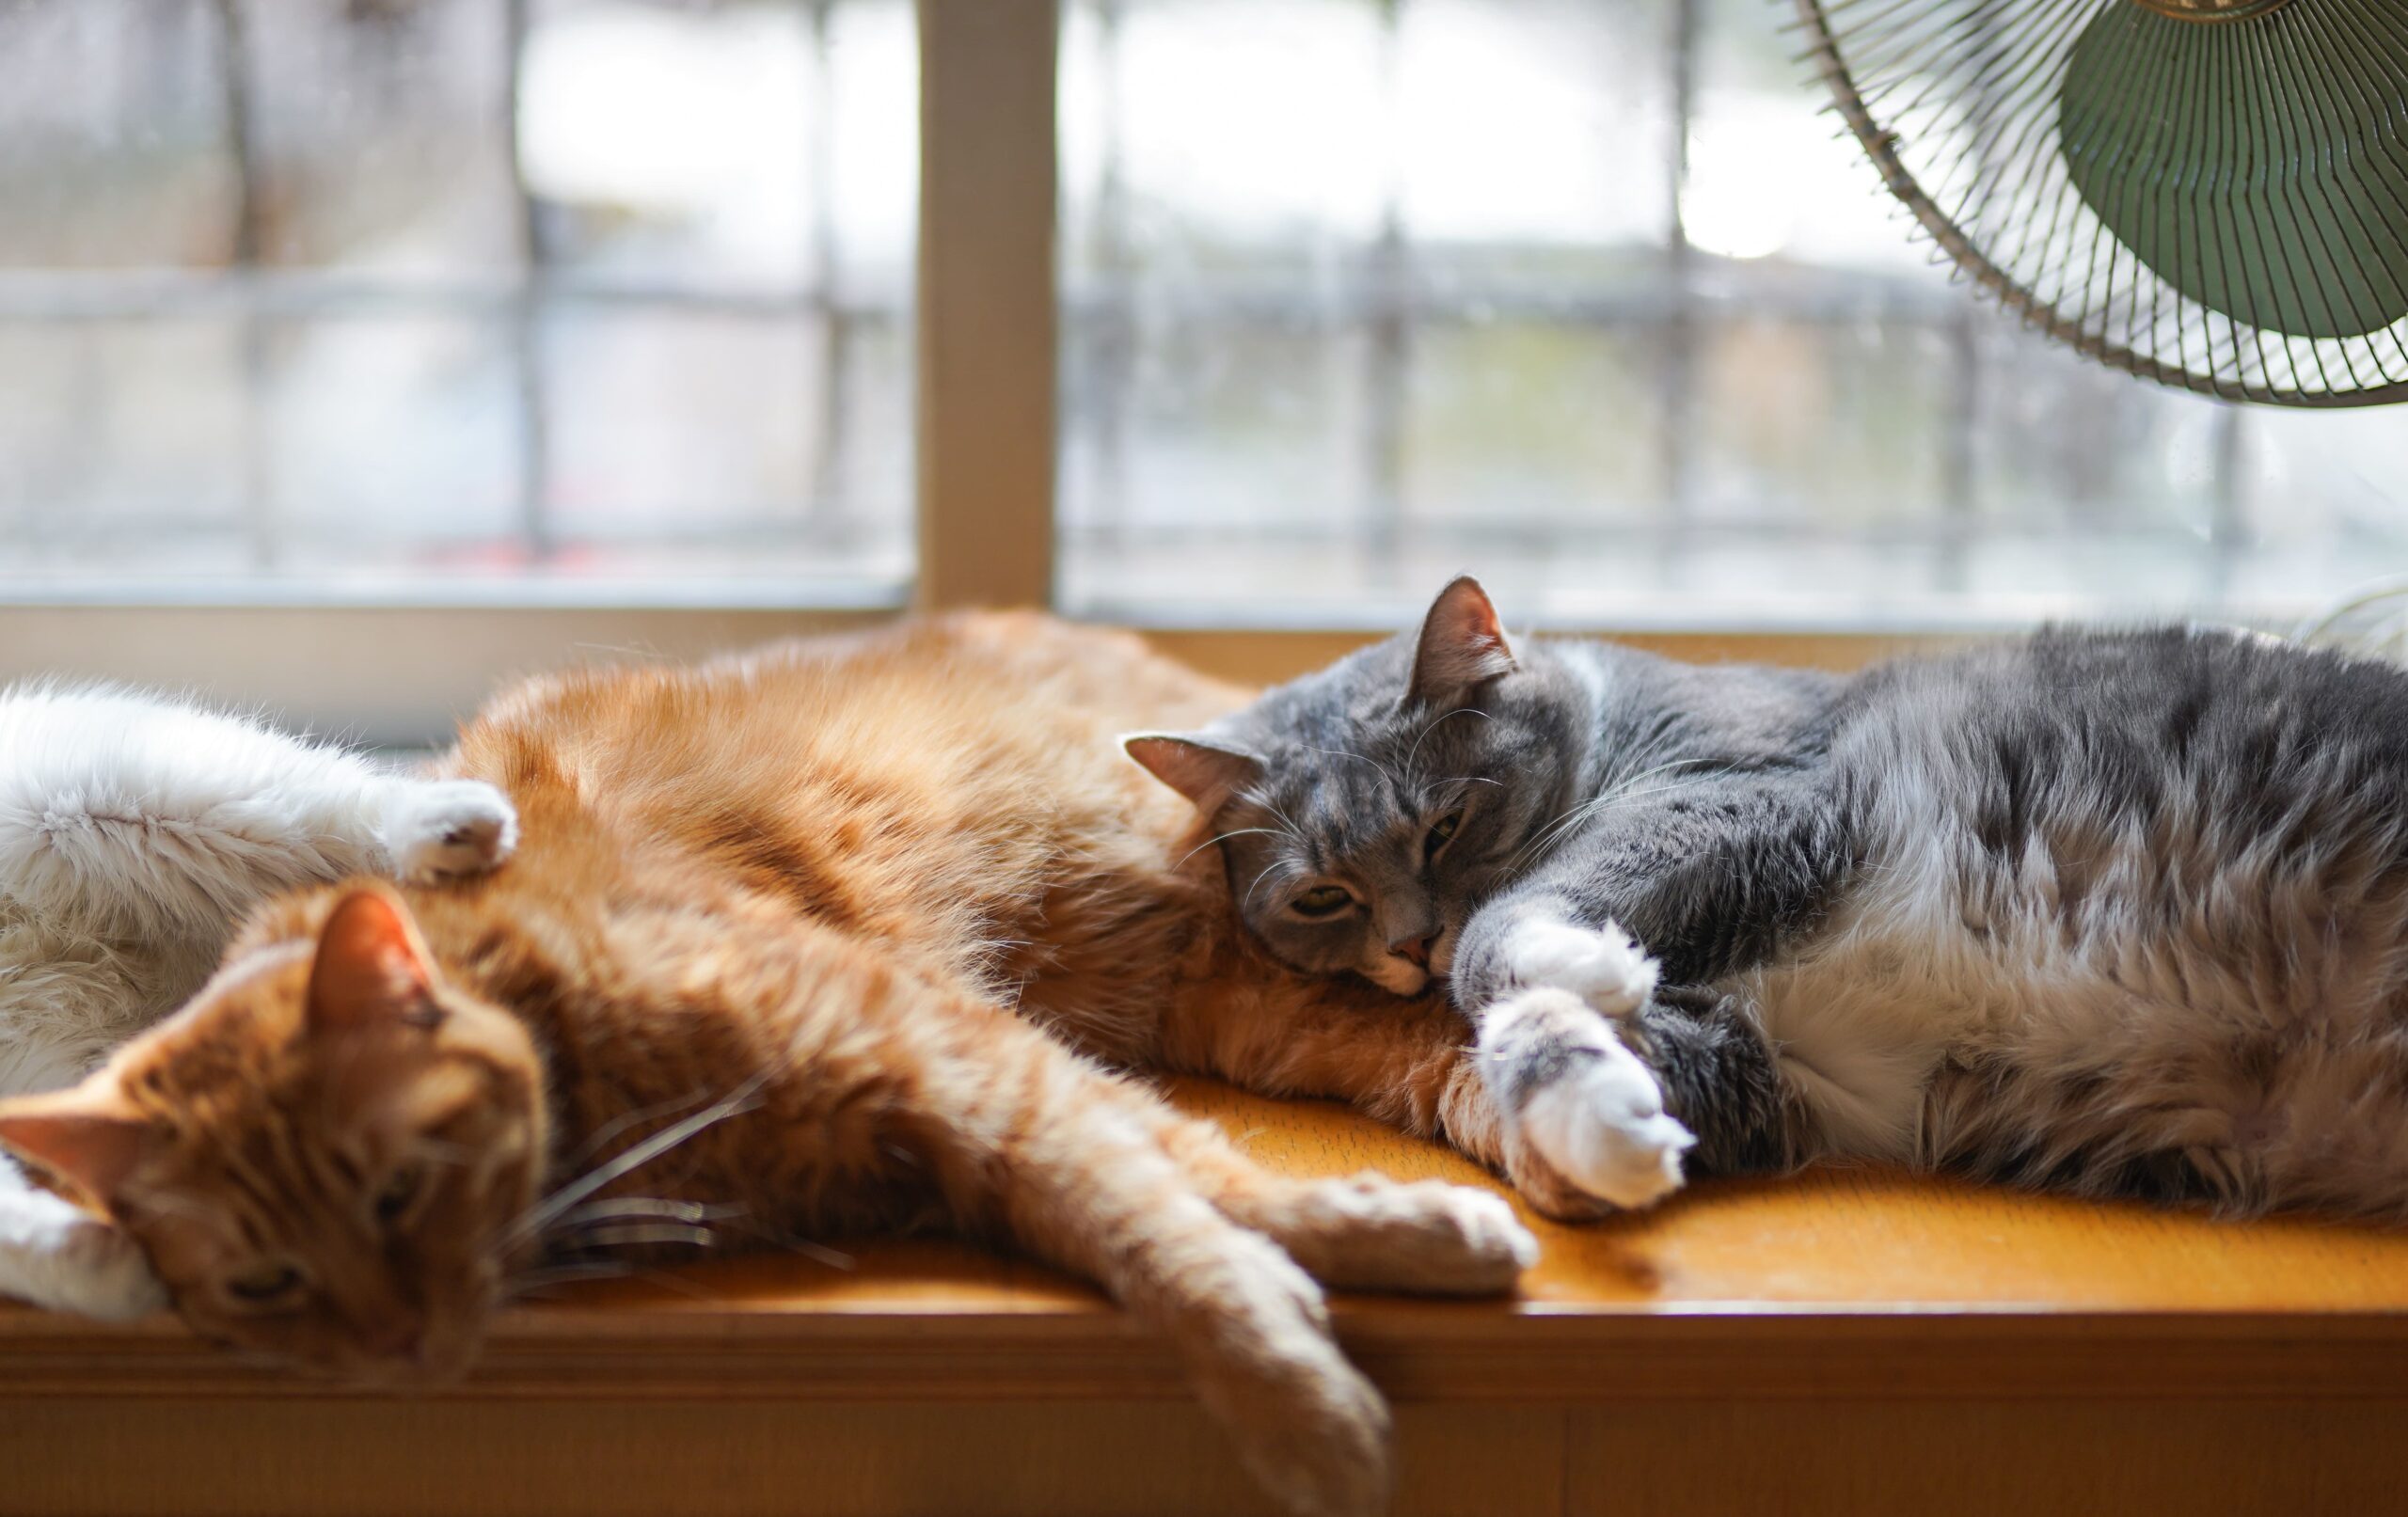
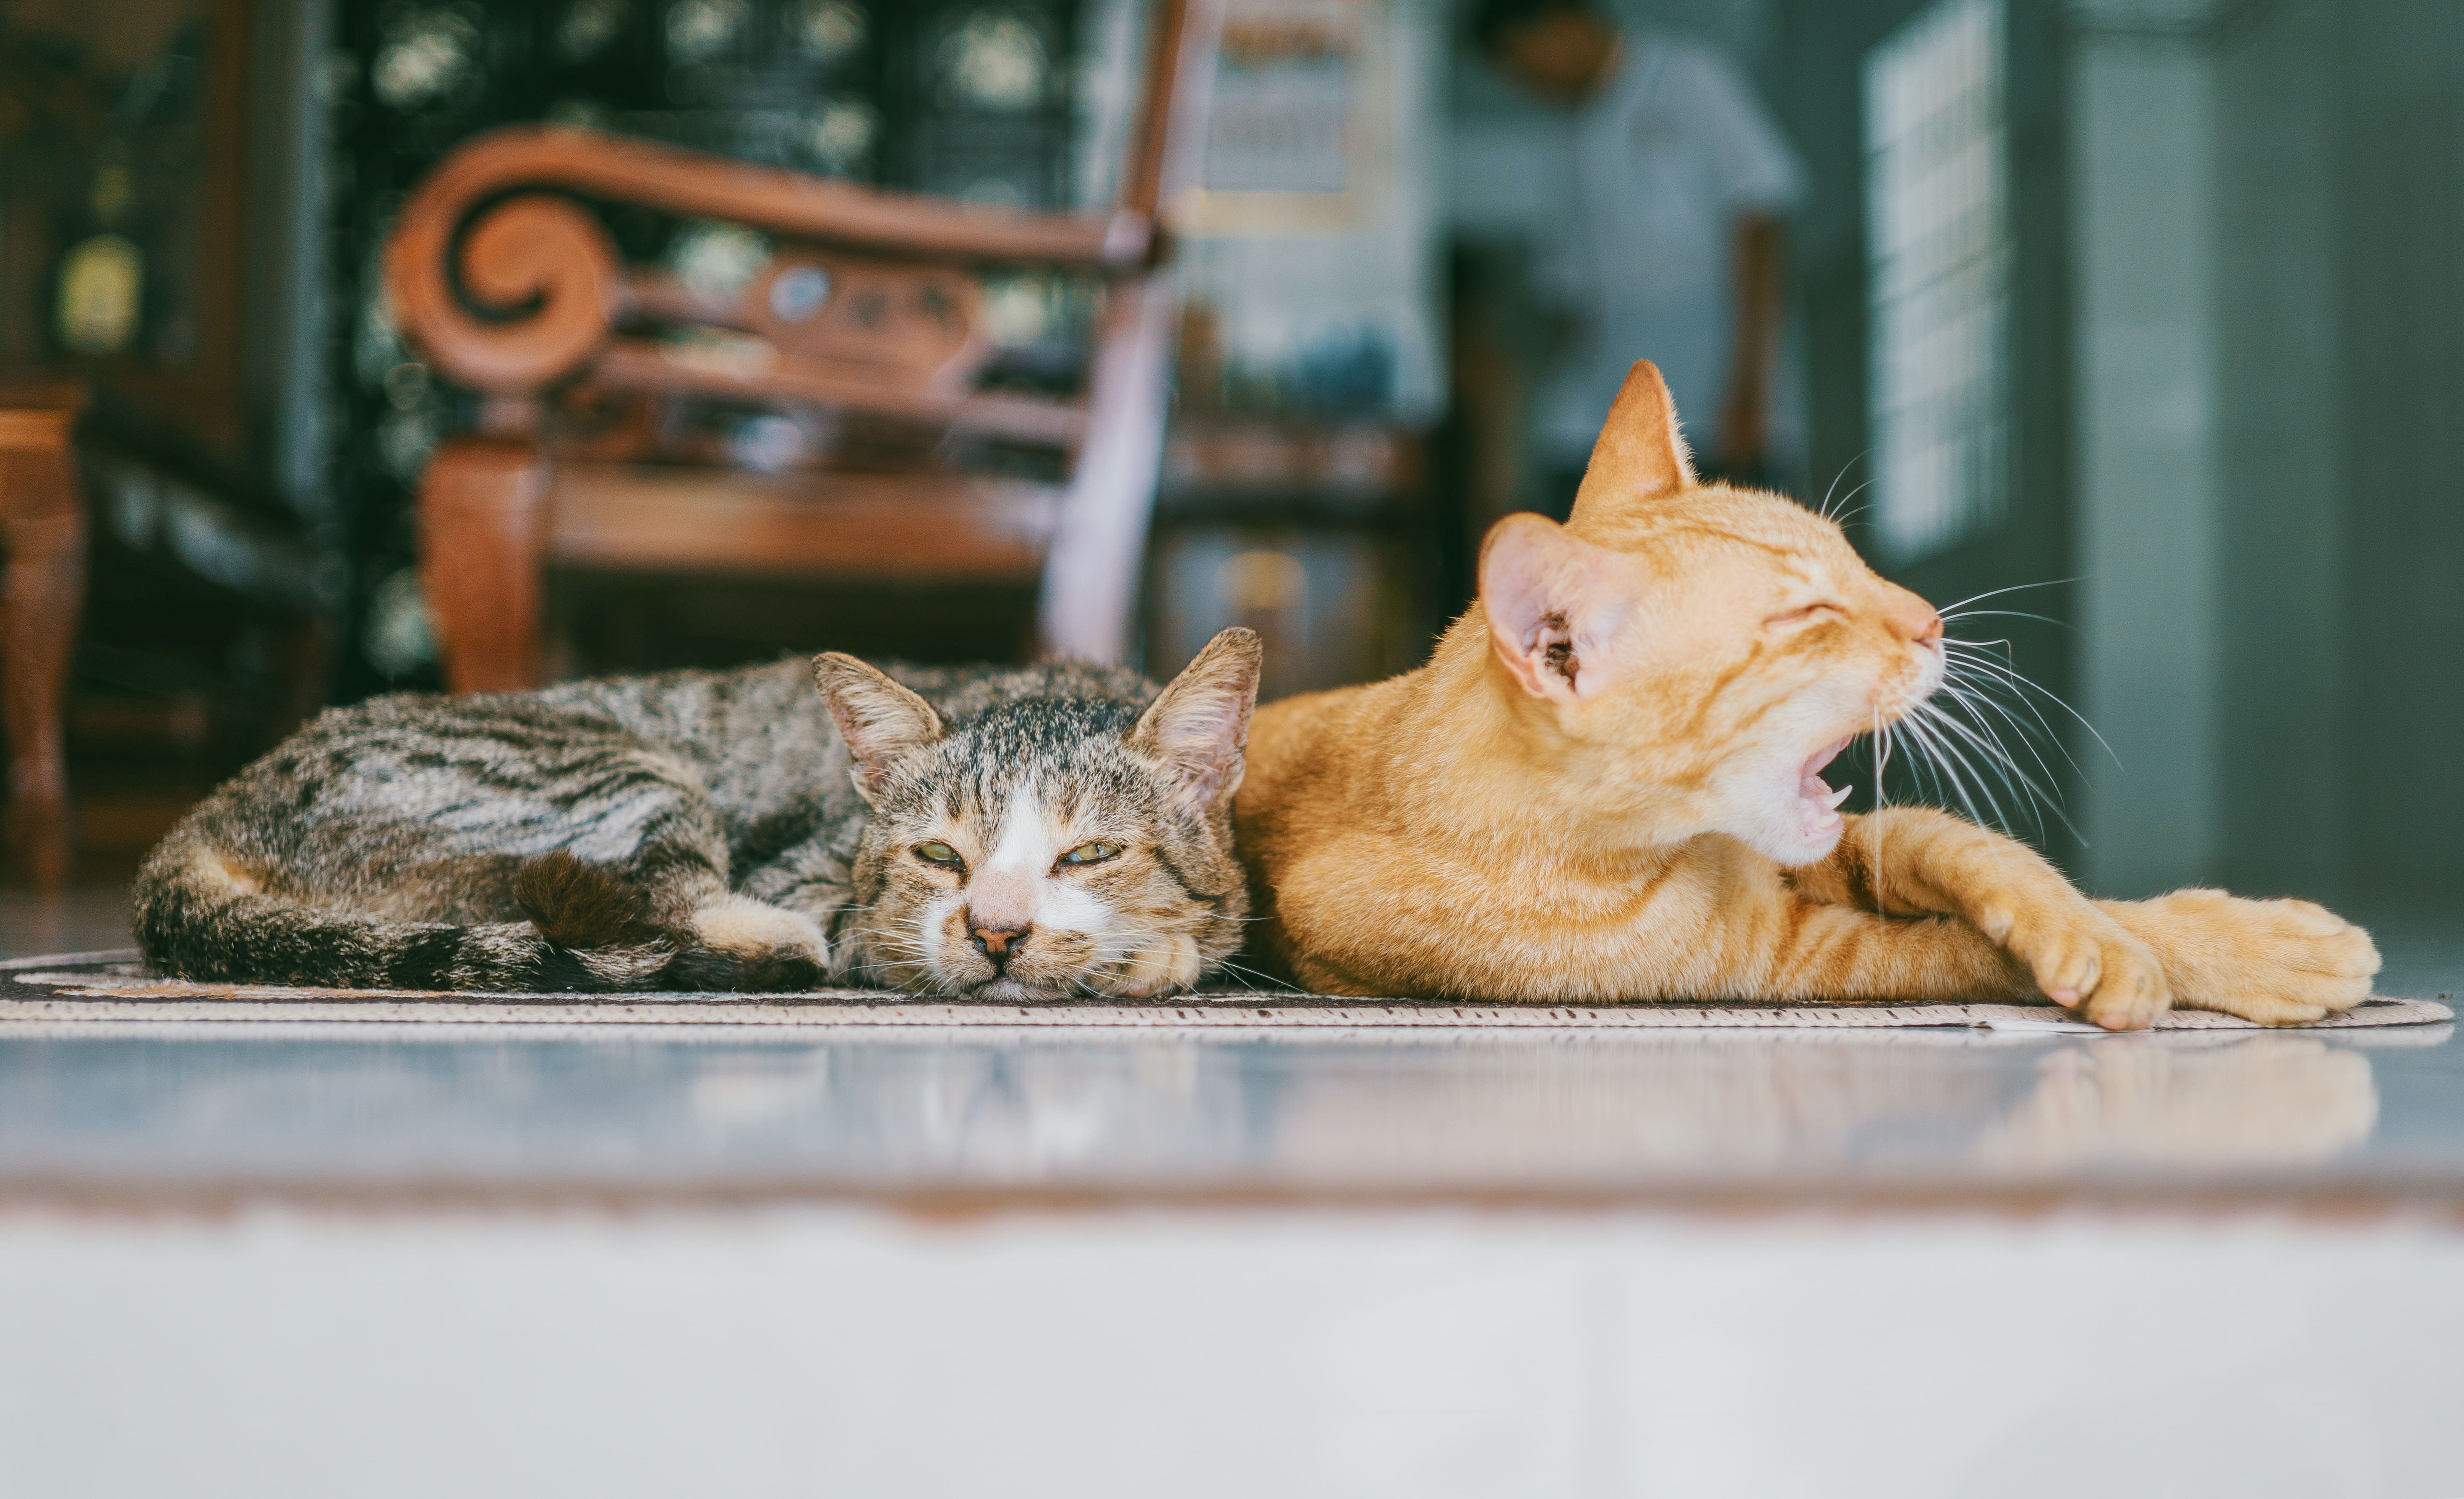
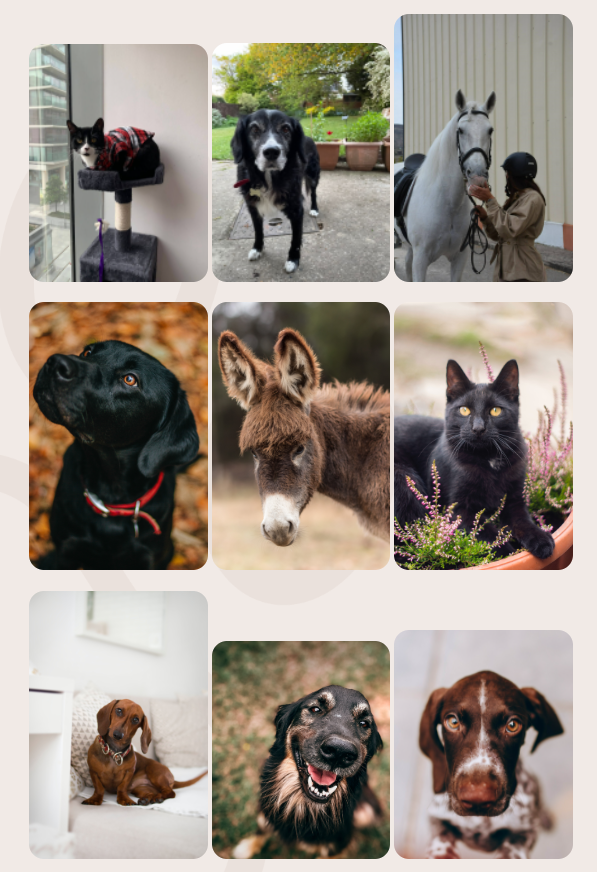
When designing a site with images it is important for the images to all work together, be of the same style. This aspect of design was something I learnt during my placement year. I was often in charge of selecting the right images to use for the website I helped develop and managed. I learnt that often using stock images can look staged an artificial which can work in some cases but for RescueLife I feel its much more important to get a real sense of the pets though the images. I want to portray excitement and energy. I also opted to use picture of only pets and not humans, maybe a controversial choice and people relate to other people but the pets of my site, especially the rescue portion of it need homes and families, that is what is currently missing in their lives and the images portray this realty without it coming across too pitiful or obvious.


Character
I considered the use of a character in my application to make the site feel more welcoming and personal. Despite the use of a character having most affect on children there is evidence that the use of a character can have a positive impact on adults as well, especially if they are well liked
source: Rebecca M. Chory
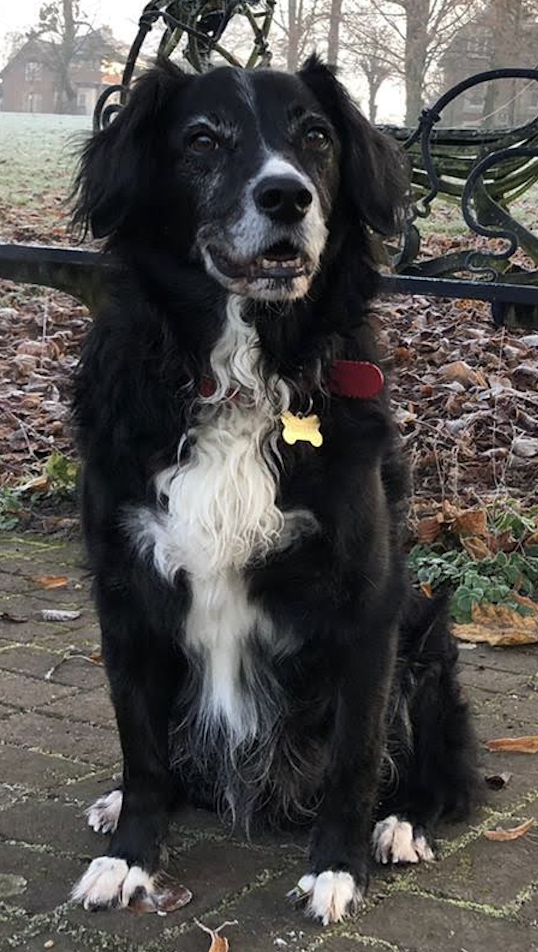
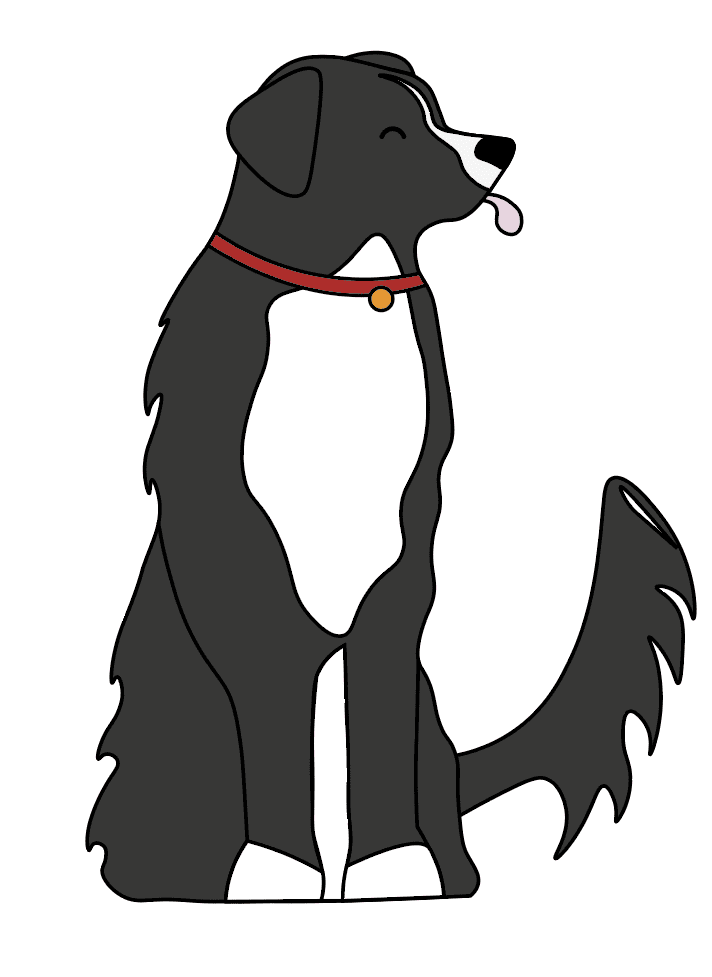
It was critical that a potential character would not make the application feel too childish, so I initially designed one based of my childhood dog, who was a rescue. The idea of having a personal story behind the design of the application felt appropriate, my audience are likely empathic people if they have decided to adopt a pet themselves and can therefore relate to the character directly.
I did like this design however this illustration took a long time to complete, and in order for the character to feel relatable and alive I wanted to illustrate him in a variety of positions. Due to the time pressure this would not have been feasible.
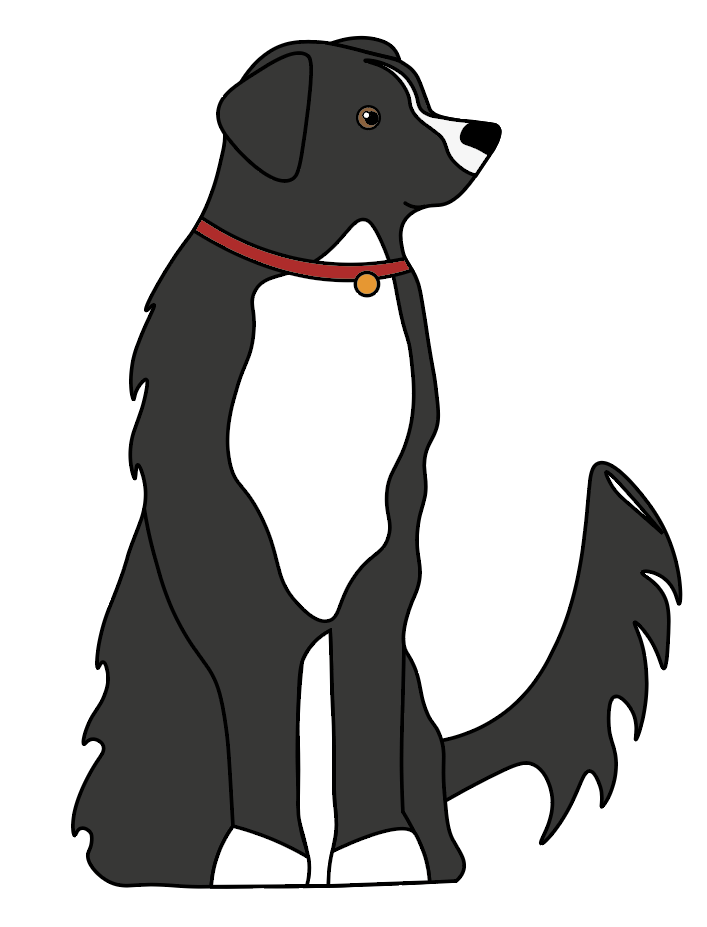
Character design 2
My second version of designs for the character where much more simplified. Therefore I could make multiple versions for different points across the application. I was a little concerned that in this design Charlie felt more cartoonish and potentially targeted children however with the right approach of integrating him onto the platform he wouldn’t look out of place.
Other versions


Gallery of images
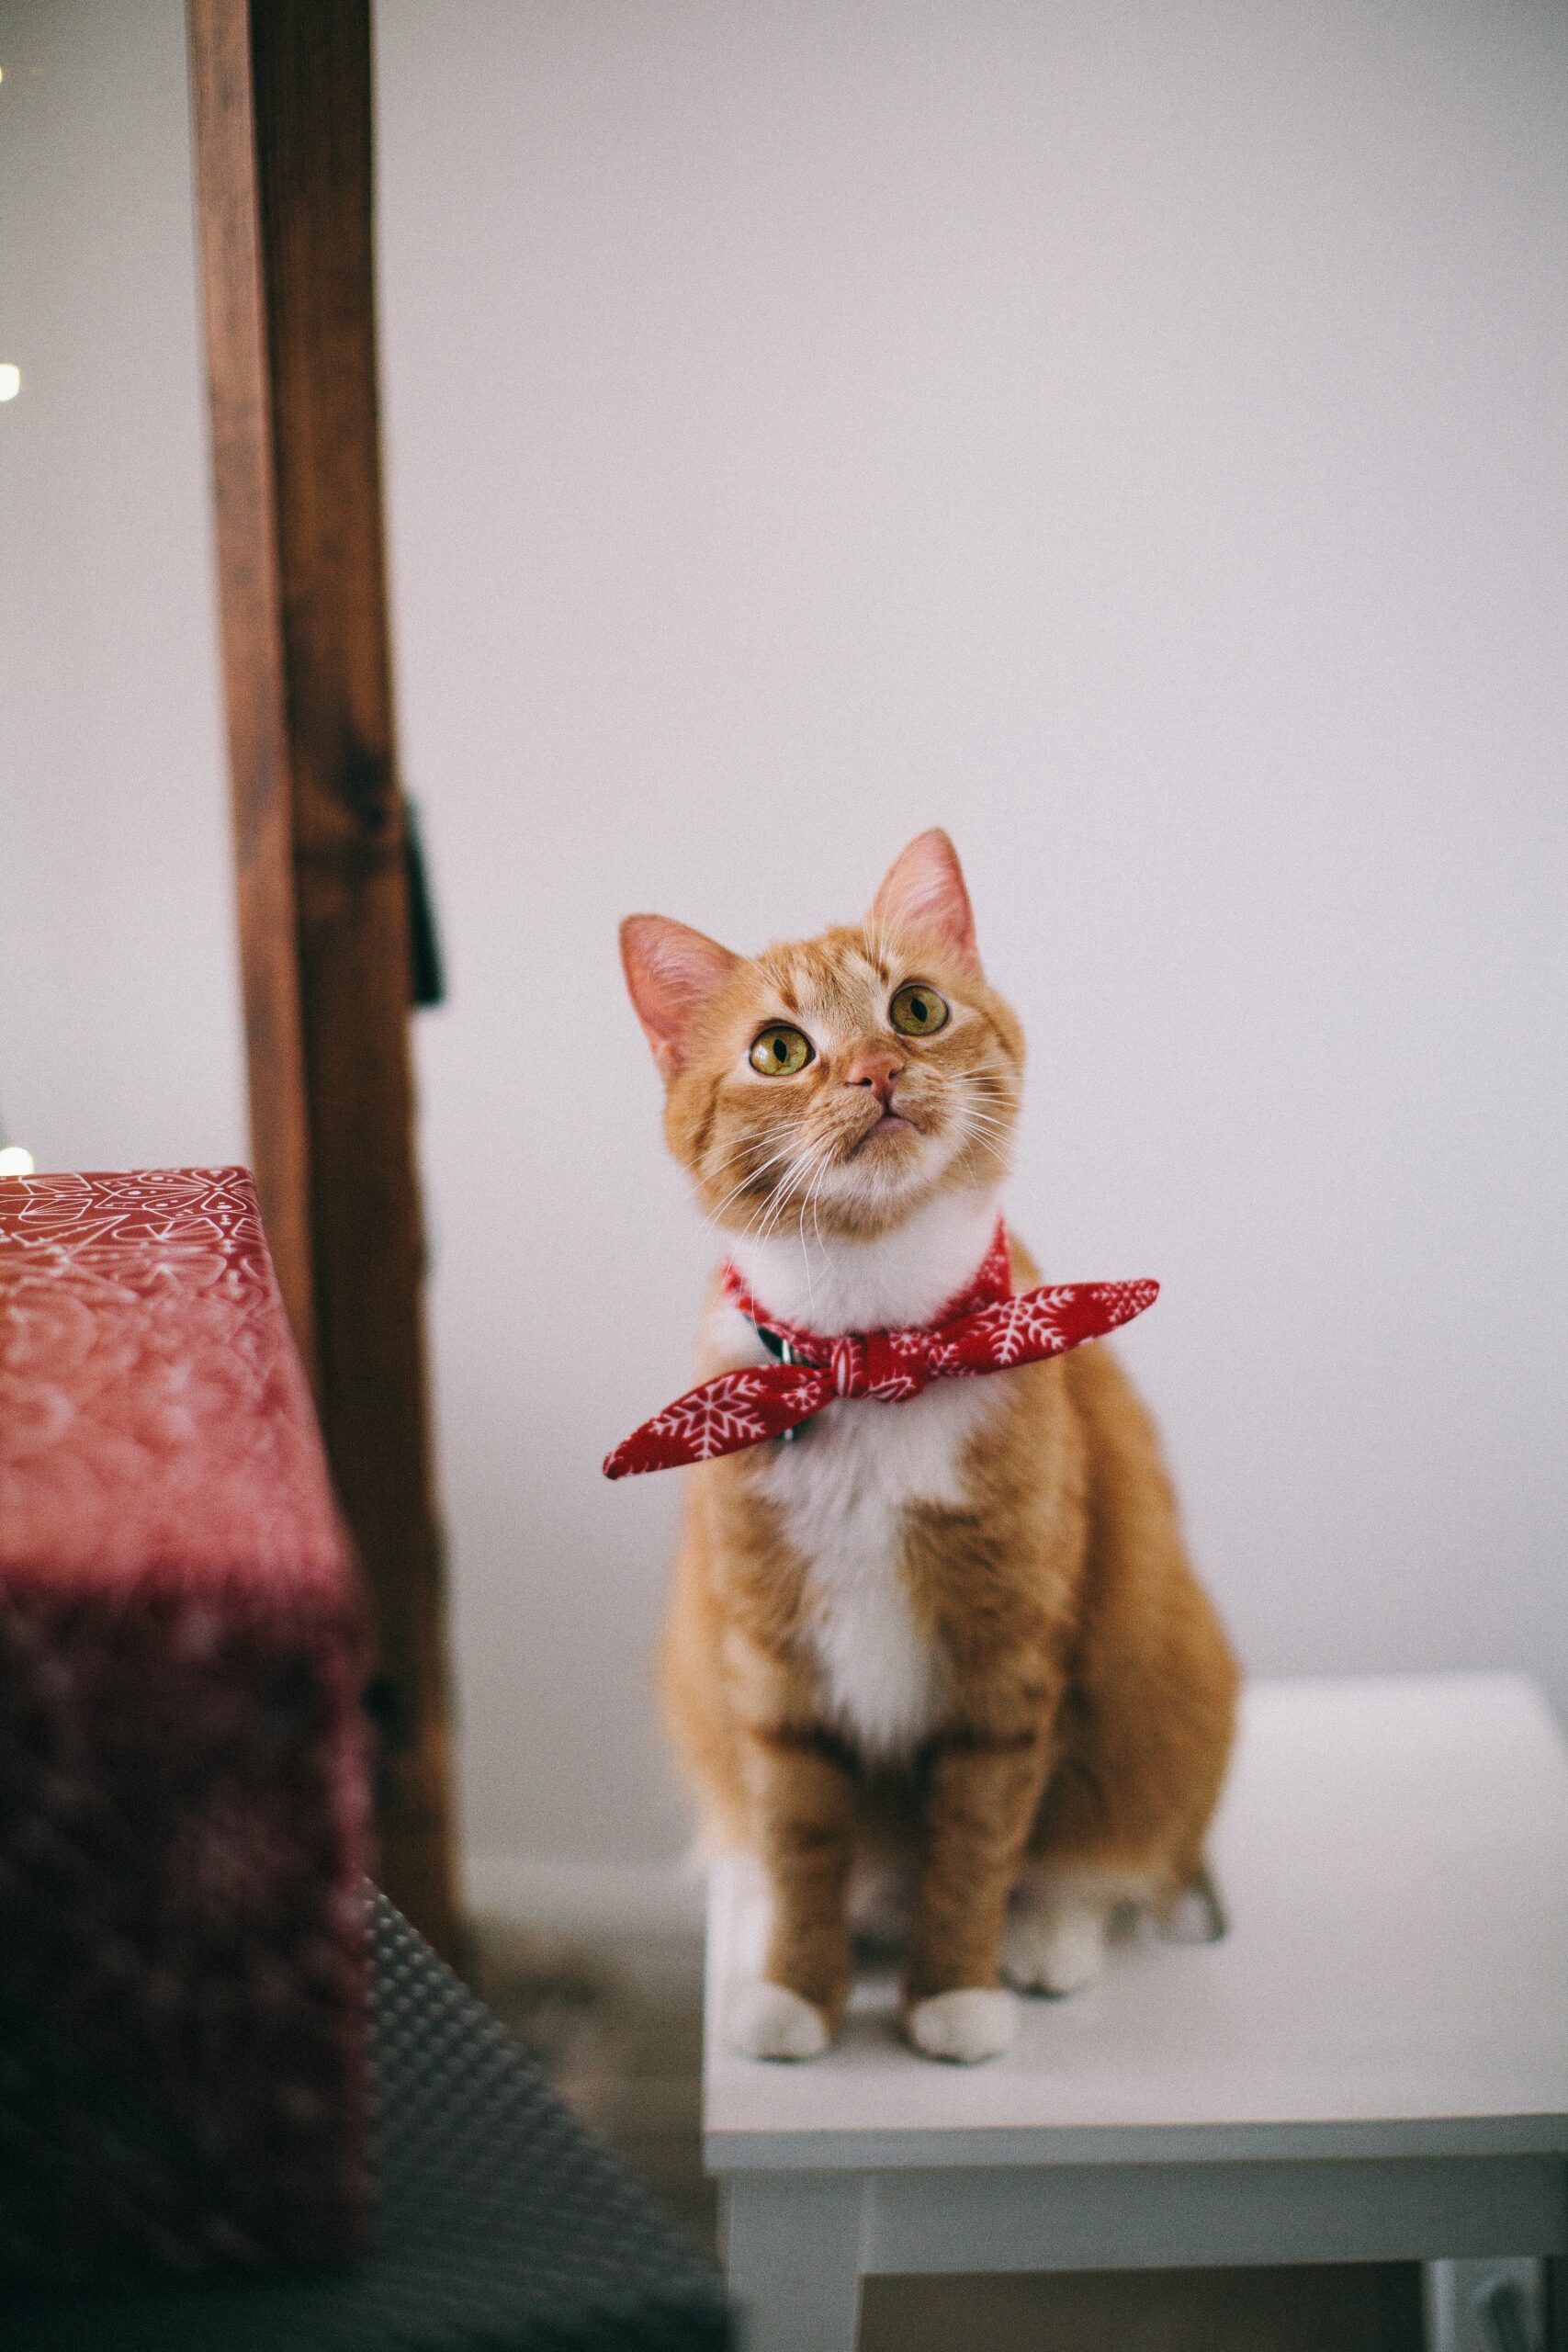
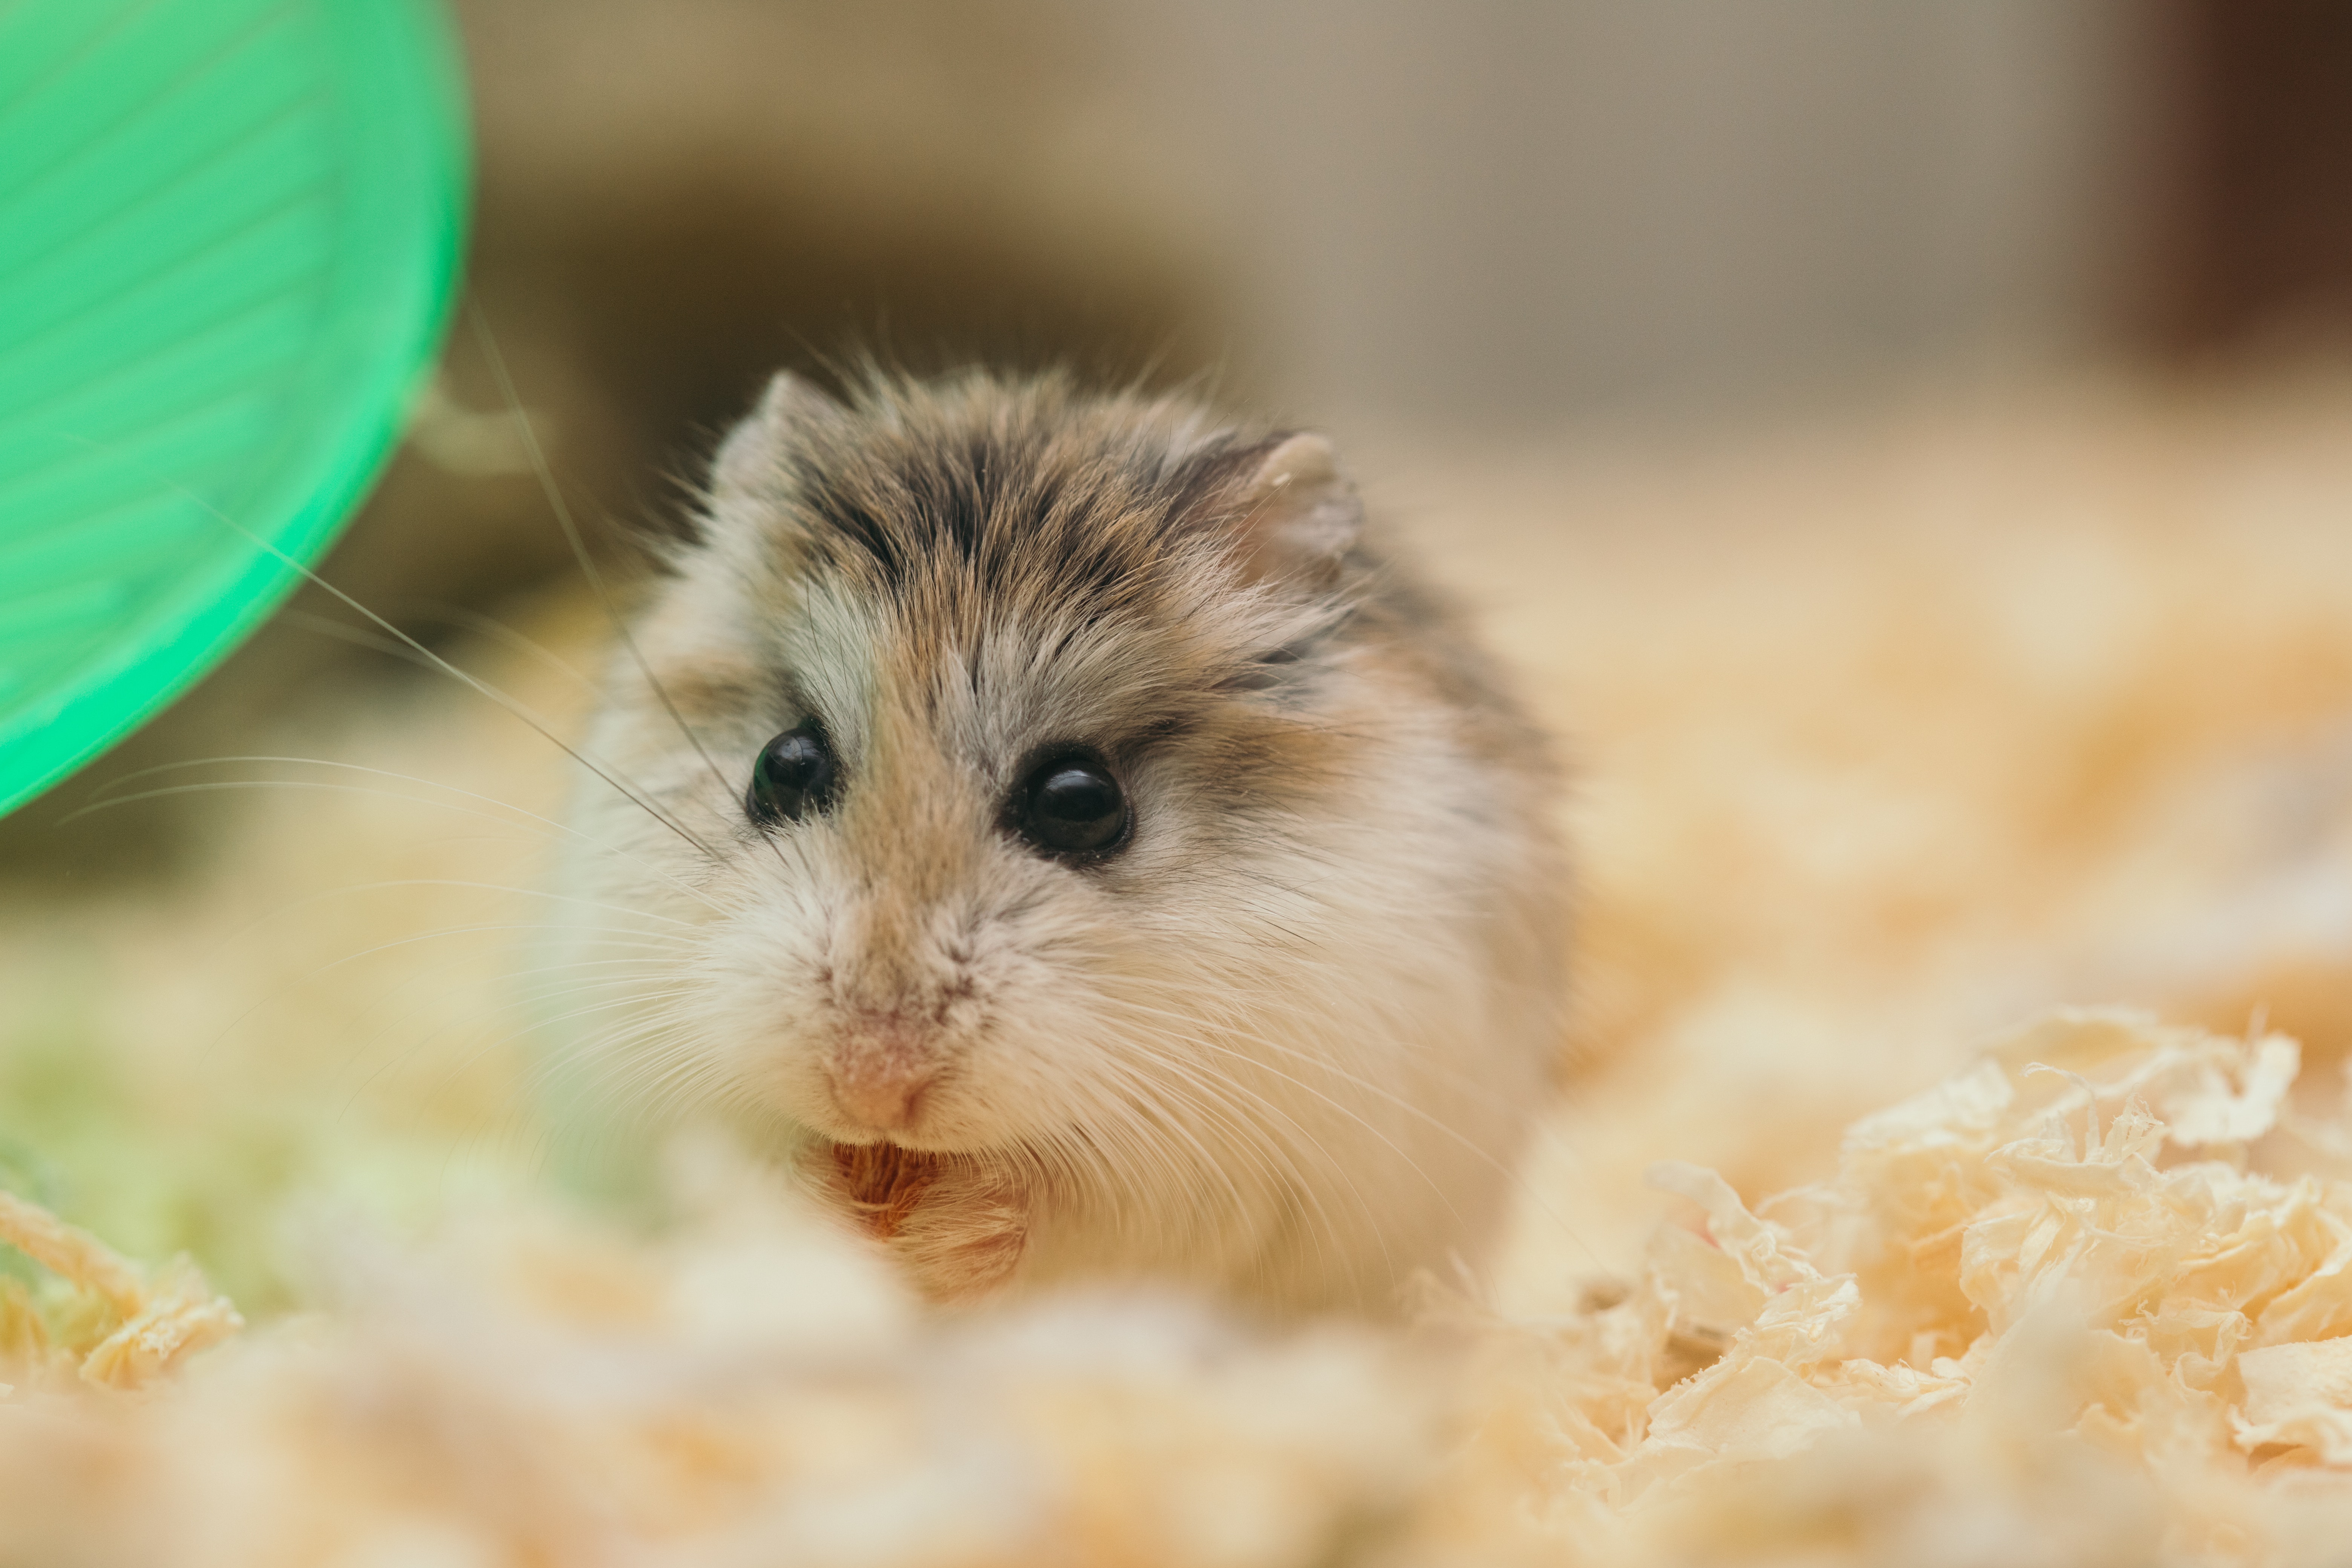
These images are the style I want to use around the website. I felt it was important they where aesthetically pleasing and eye catching but not too perfect or staged as most rescue shelters don’t have the capacity to take perfect images of their pets.


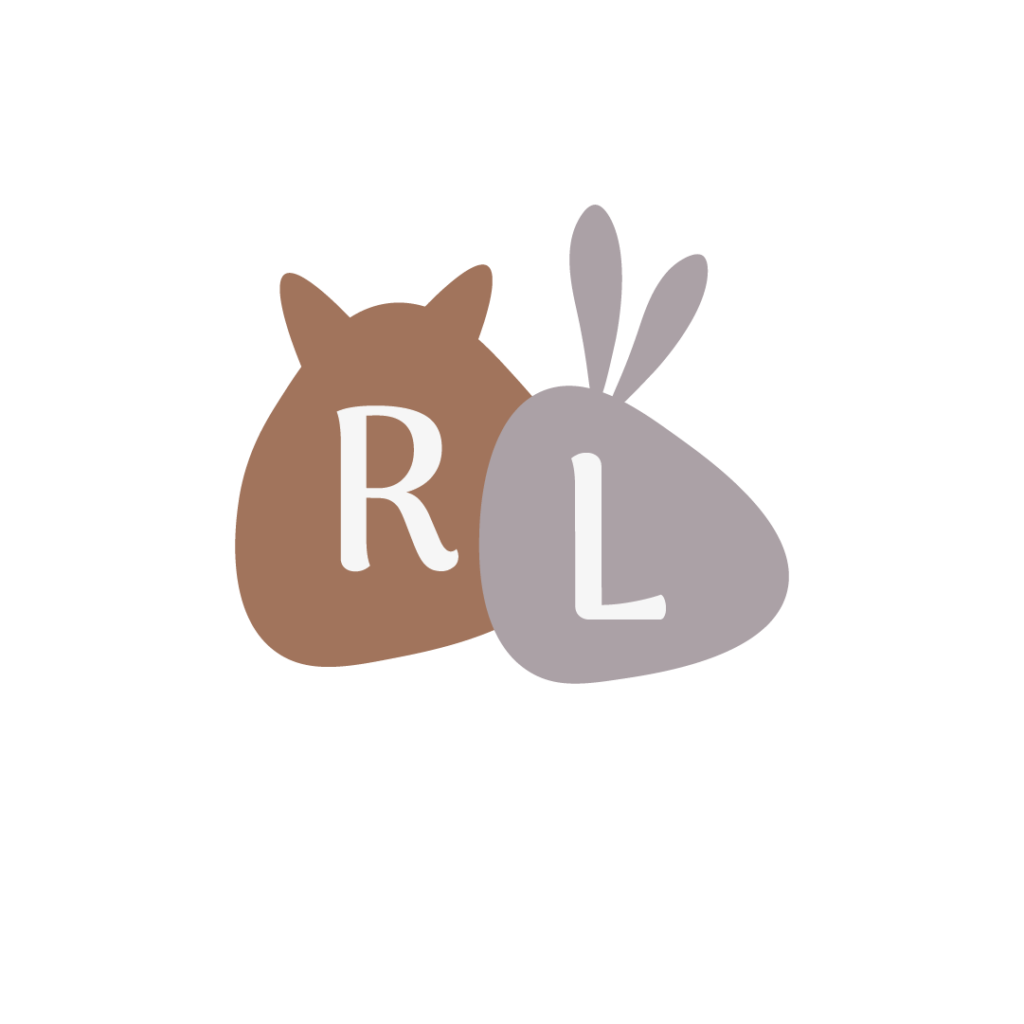

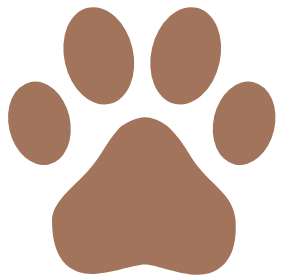

Logo Design
For an application such as RescueLife its important to have memorable logo and branding. For the logo design I wanted to use a mixture of the text and some sort of graphic. It has to be recognisable and relevant to the industry in which it operates.
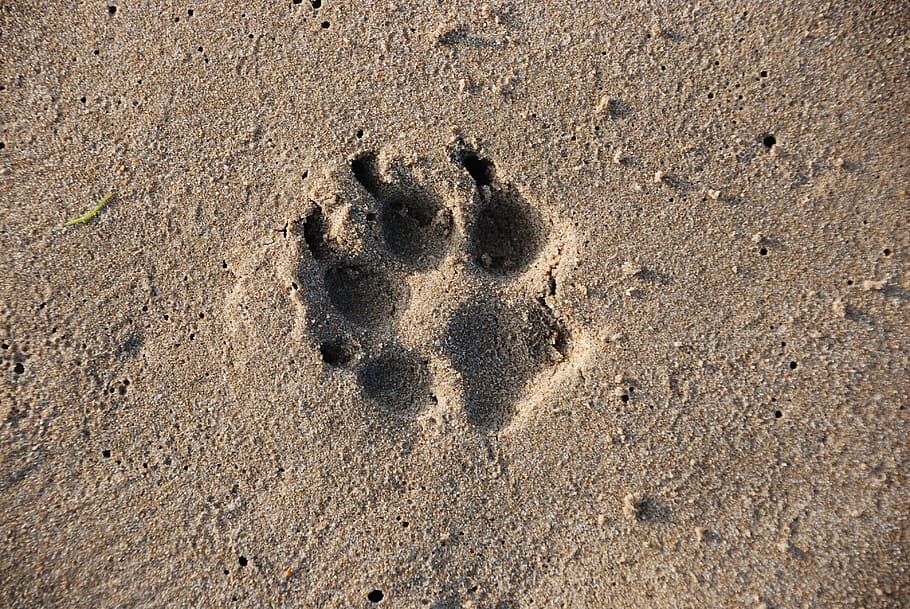
I experimented with a few design ideas, I used a paw print in some of my initial designs which I thought I wouldn’t like as its very commonly used amongst the animal industry, however this means that it is very well recognised. Paw prints are often easily associated with animals and if not more specifically pets.
Using a paw print along was too simple and gave the logo no sense of self identity. Therefore I tried to personalise it a bit by using the silhouette of my character designs of Charlie to cut out a shape in the logo. Initially I used the standing graphic but I felt like this looked like an adventure brand, it was also quite detailed and as the logo would be very small in some circumstances it is more appropriate to use less detail. So I opted for the graphic of Charlie sitting, the outline of his head was much clearer and more recognisable. I really like this logo its recognisable, fits the brand well and has a personal reference.
design ideas
After looking at some existing sites I created some designs of my own.
In design concept 2 I was experimenting with how little information you could provide on the dashboard. The mosaic gallery layout is appealing to look at however it does provide very little information about each animal. Susan Weinschenk mentions Progressive disclosure in her book 100 Things Every Designer Should Know About People. Its a concept that states the importance of only showing a user a few options or limited data initially, as too much data can be overwhelming and off-putting. In this design I was experimenting with ways to strip back the information as much as possible. It’s very important however that the design of the application does not get in the way of the functionality. Most current rescue shelter websites are created solely around the function the site must fulfil. Considering this design is just images it might be a little too simplistic. I really like the layout but its important to provide the user with a bit more information on each pet as at this point they would have to go clicking through hundreds of different images to find a compatible pet.
Design concept 3 has many of the same issues and concept 2 as it has very little text, I did consider including text over the images but this could easily get lost as the images are a variety of colours. I do really enjoy the big bold images and I think its a creative way to display the pets however the design its trusting in the idea that all the images uploading to the site will be nice. These filler images are form pexels which offer a beautiful range of well shot images. It is very unlikely all rescue shelters will have the budget for this and this design wouldn’t look nearly as good with poor quality photos. The design also relies heavily on all the images being landscape which again is very unlikely so for those reasons I has to discard this concept.
This two designs are quite simalar. Initially I create design 4 with real simplicity in mind. I provide some information, such as age, size and breed as well as an image. I kept in mind progressive disclosure when designing it. As soon as the information become overwhelming it will instantly turn the users away. However I did feel like design 4 was quite basic in terms of the surround design. I appreciate the minimalism but this design could get boring quite quickly. I aded s background image in concept 5 which definitely added something to the design but I don’t think would have been very scalable and the background images would have to be very specific to work well.

These next designs look more viable then some of the other options. I like the header in both of the and how the design continues down the page, it feels intentional and streamlined. In design 6 I like the use of abstract shapes but I worry the deter the attention from the pets.
In the design 7 I experimented with using just iconography rather then images. I ended up liking this design a lot more than I had initially expected. Although it lacks a bit of the colour and action from the other designs I like how the icons fit with the logo and over all theme, its simplistic but interesting. Personally I don’t think its suits the mature of the website to have no decorative images but I ended up liking the icons so much I was interested in potentially incorporating them into the future designs. My only other concern however was that due to the time limit of the project making my own icons would take up time. The icons I used here were from flaticon but if I used icons beyond the design process I would make them myself.
My last experimental design was for the profile page. I experimented a bit more with colour and despite it being bold I like the contrast I had created here. I also think the background paw prints add some more interesting design opposed to the plain background. However with the dark background I worry that it draws the eye more than the content which is where I want the focus to be.


Development
It was important that I approached this code early on in my project as I was aware I was being ambitious with the functionality. At this point I have concluded on the use of mongoDB and established a working connection after have a slight challenged with mongo not opening a connected on my local host. Fortunately opening a new mongoDB window fixed this issue.
My next steps where to set up establish what data I wanted to send to the database. In order to do this I used the examples from the full-stack module completed in second year to create a simple program which I could the manipulate to work for the purpose I intended for.
Establishing data
It took me a few weeks of development work, along side continuing with design work to get my program working as a contact manager similar to the example from the Full-Stack web development module. Despite taking slightly longer than expected due to issues previously mentions such as the syntax update, I managed to get my code working as in the example with few setbacks. My next priority was to edit the schema to cater to the data I wanted to send to the database. I had set it up to. just send text inputs but I wanted the pet form for RescueLife to be as easy as possible and felt it was necessary to have a variety of inputs dependent on the data. For example, RescueLife has 4 categories of animals, ‘Dogs’, ‘Cats’, ‘Equines’ and ‘Others’ therefore a radio input was the most appropriate choice in collecting that data on which category the pet fell into.
Sending both radio and boolean values was a challenge, I couldn’t find much documentation which indicated how to do it and after many experiments to little success, I decided to talk to my tutor and Chris was able to provide some guidance. I needed to include a value which would be equal to the data I wanted to send to the database in each category. For example for the dog category I would need value = “dog” .

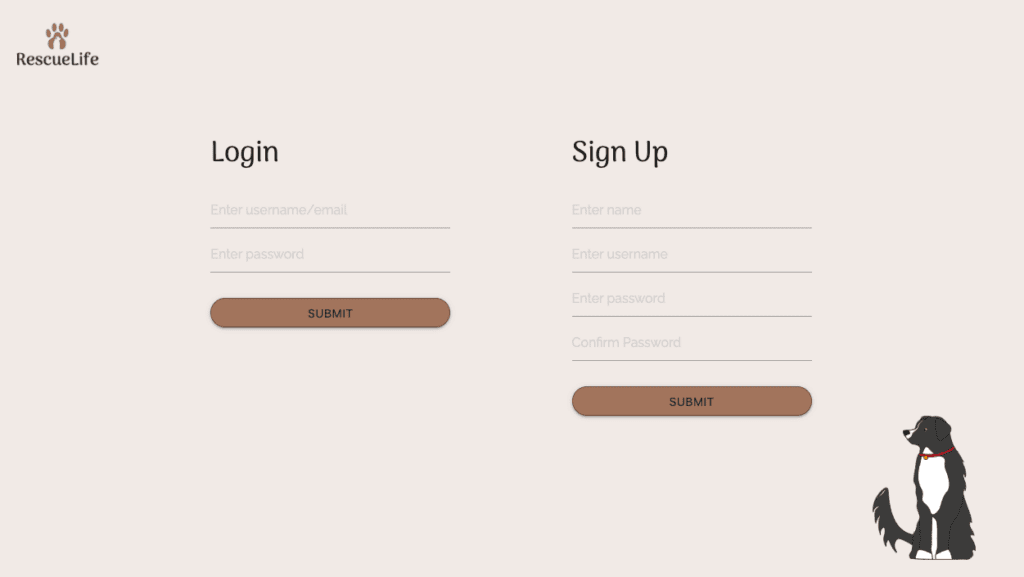
User accounts
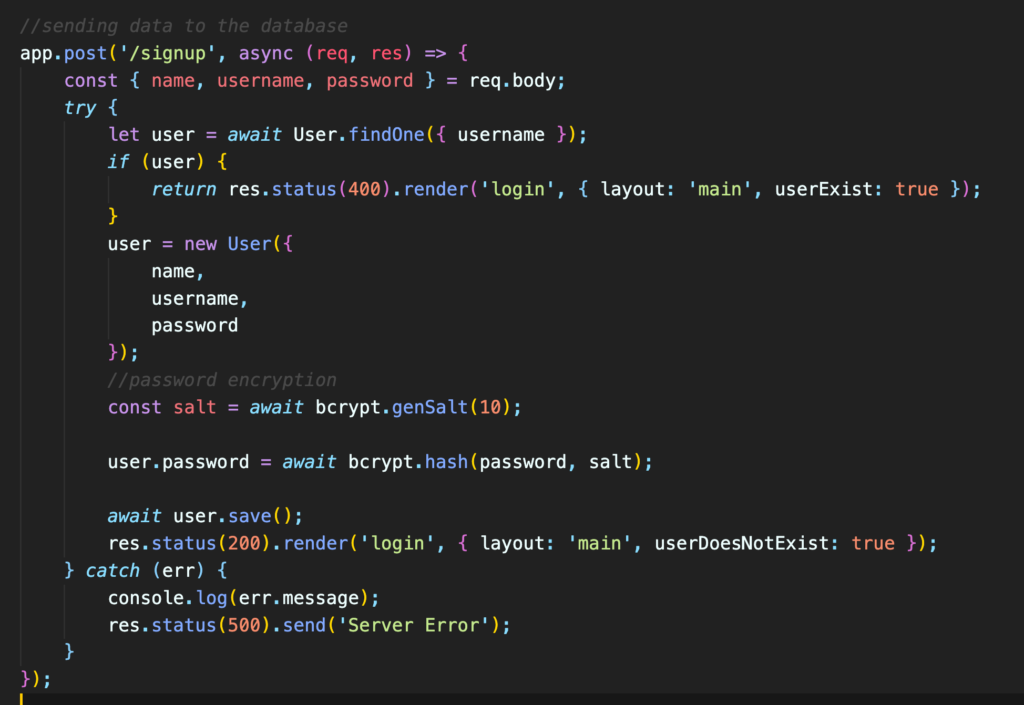
The pet information was not the only data I needed to store in my database. It was important my application had user accounts, so that pets could be referred back to the user that uploaded them. In order to create this I needed to create a sign up and login form, the functionality of this was simple as I based it off the demos from the Full-Stack module and looked back on my own code I had completed. The sign Up form had a couple pieces of functionality that would prevent a new user singing up with the same username as an existing user and ensure when a new user entered a password, the field would match with the confirm password field.
As for the Login form, the user has to enter there username and password and these details would be verified against the database, if not returning the messages “user does not exist” or “password incorrect”
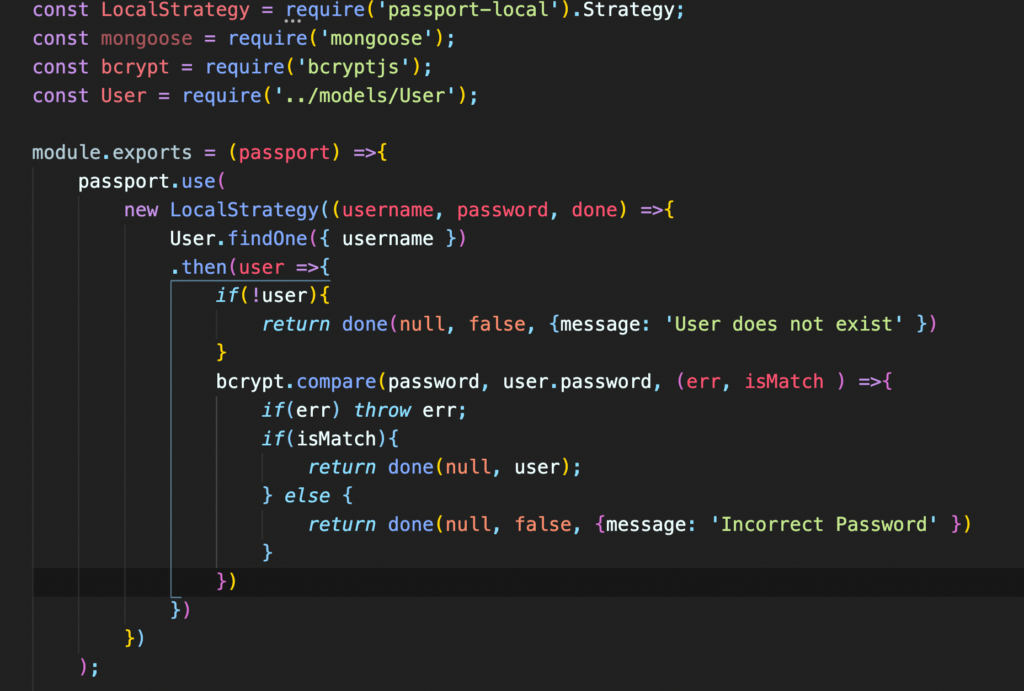
In order to get these forms working I used passport.js which is an authentication middleware for node.js and can be easily used in express based web applications. I used this to compare the user entered to the existing data to prevent any duplicate or redundant data in my database.
To prevent any users reaching the dashboard without being logged in, I created and authentication middleware that I could pass into the server.js file when calling pages and data from the database, if a user was not logged in, they would be redirected to the login page. In order to prevent users being logged out instantly I created a sessions with I set to 6000000 milli seconds which is equal to about 1.5 hours.
Finally to finish off the login system I needed to ensure the passwords in my database where safely encrypted. Encryption is important to protect private data and prevents unauthorised people accessing sensitive information. I used the bcryptjs library which is part of the npm registry. I could use this to encrypt the users passwords so in the database they would appear as a random string of numbers and letters. I used the salt function to add on random character to each password passing it though the process about 10 times to ensure the password was very secure. This then required me to add in the functionality into the authentication file (isAuth.js) to un encrypt the passwords during the login process which I used bcrypt.compare to compare if the entered password and the saved encrypted passwords matched.
Social media analysis
In order to get a good understanding social media design trends I looked at currently popular social media designs. I chose instagram as it is the closest social media to RescueLife in the sense that its about posting predominately images and theres also a large community who post about their pets and essentially use instagram in the way I envision them using RescueLife.

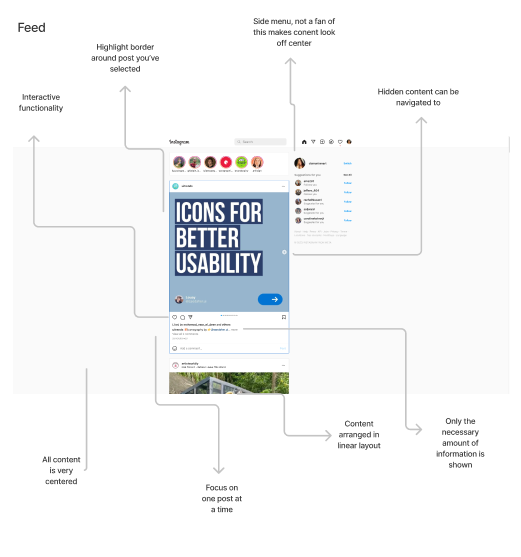
Personally I don’t like this disparity between the two versions of the same app. However the logo only appears on the home screen of the mobile app rather than on most screens on the web version so it the function was the same, it wouldn’t do anything on the mobile version.
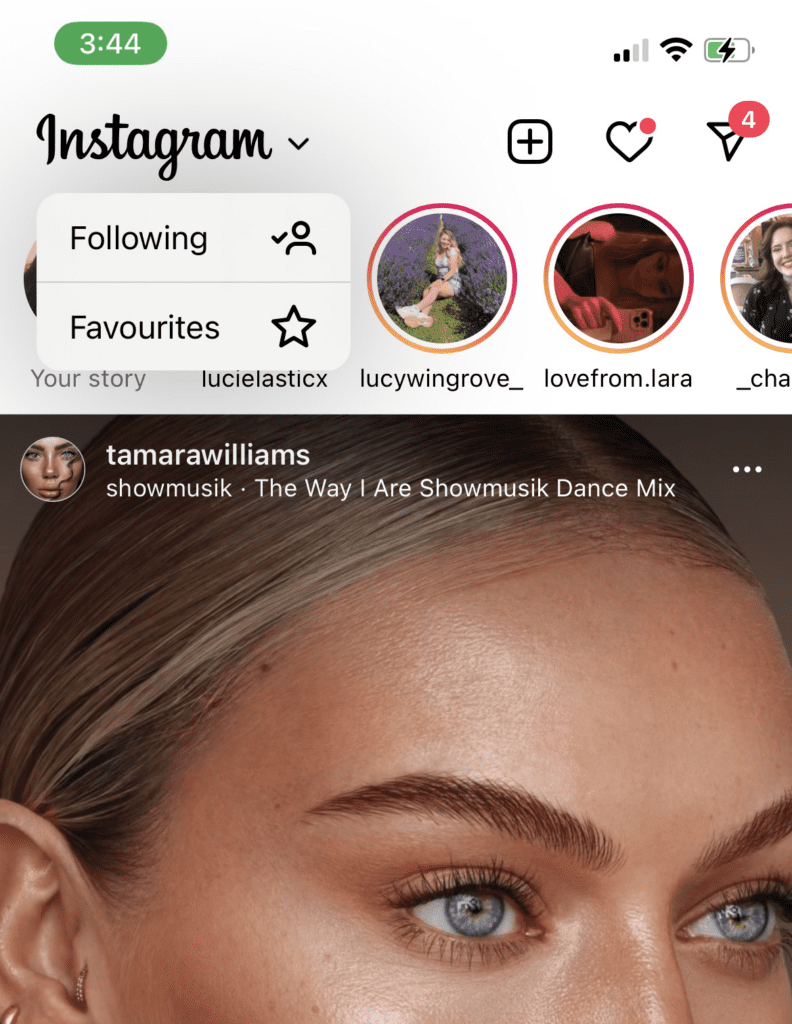
The profile page in general was quite simple in appearance. The largest part of it was taken up by content, just images to be specific as no context is offered on the initial view. I do like the grid layout making all images the same size in this overview it keep the layout neat. It does however make the profiles feel quite similar by design and there is no individuality in this layout . The navigation is in the top right corner and is solely made up of icons. I do like this design choice and feel they are all quite self explanatory which makes navigation easy. I also like how the icons are the same and follow a similar layout to the mobile version, this consistency makes the service seem more streamlined. The biography section gives a decent amount of space for the user to write whatever they would like, typically an introduction to them/ their account. Instagram have also included stories which is popular amongst many social media platforms now and a way to upload instantly but for only a limited amount of time, typically 24 hours. In some cases it then disappears forever, but on Instagram if saved it will stay on your profile underneath the biography. Stories are popular and I do consider including them in RescueLife but not in the initial designs. It would be a feature to potentially add in later design iterations.
Looking at the profile page layout on instagram I can see some common layout choices such as having their logo in the top left corner which is also a button that takes you back to the home screen interestingly this button has a different purpose on the application. On the mobile version of instagram the logo button opens up a drop down that gives you 2 options. The first is to take you to a feed of everyone your following and see all the post starting with most recently posted. The main feed on instagram is manipulated by and algorithm that only show you posts its predicted you’ll interact most with (source) and there is now the option to see an unedited feed of posts from people you follow. The other option is to see you’re list of favourite accounts as Instagram describe “accounts you just can’t miss out on”
I next looked at the feed page of Instagram also the home page that a user would land on once they’ve logged in. This page layout is very simple and there is a clear hierarchy on the content. The most prominent thing on this page it the post central and taking up the most space, your eye is clearly drawn to it. Almost everything else on this page are accessories to the main content. This works well for instagram, this is where to app wants its users focus, and get caught up in the unlimited scroll. The next most significant thing of the page is the stories which again is content and something encouraged to view. The next few items are items such as suggested follows, the menu bar and search functionality. I don’t like the side bar menu of suggested followers as it throws on the alignment of the website, it looks like its outside the width of the content container and makes everything look uncentered.

Data collection
Despite being an ideal user for RescueLife myself, it is important to get a variety of opinions on the topic to help influence my design choices. I decided to create a survey to get a general idea of my target audience’s ideas on adoption which could feed into how I develop and design my application.
The data I was interested in collecting was firstly, from my sample of mostly pet owners,
- How many would currently consider adoption?
- How many currently own or have owned an adopted pet?
- What are the main reasons they wouldn’t adopt?
- What methods would people use to find pets (adoption and purchasing)
Initially I wanted to include all ‘pets’ in my survey but this made the survey complicated as the process of adopting a cat vs a horse are quite different. So for this reason I decided to limit the questions to revolve solely around the most popular pets in the country – dogs and cats.
Results Analysis
The results I got back were a very useful insight into a sample of potential RescueLife users. I got 17 responses to my survey which is a small sample size and in the future stages of development I would recreate this survey and sent it out to a much larger sample group and pay for responses as in that case I would receive a much more varied sample group. But for this stage of the project I file this small group was acceptable.
I asked a total of 10 questions.
Q1. Have you ever had a cat or dog?
Yes – 88.24%
No – 11.76%
Q2. If yes, how did you acquire your most recent cat or dog?
Brought – 52.94%
Adopted / Rescued – 35.29%
Gifted / Given – 0.00%
I have new had a cat or dog – 11.76%
Q3. Knowing you could offer a substantial level of care, and you were looking for a cat or dog, what would you do initially:
Look into adopting from a shelter – 52.94%
Look into purchasing from a breeder – 41.18%
Other (please specify) – 5.88%
“Explore both options to see which one would be most suitable for my current situation”
These initial question where to understand the demographic of my responses, I specifically did not ask for any other personal details such as location, age, occupation etc as at this stage it was unnecessary I was purely interested in current pet situation and how and if that affects their opinion on adoption. Interestingly just comparing the responses of these three questions gives me some insight into my sample group. In Q2 the majority of people who own dogs brought them, but in Q3 the majority of people said they would look into adoption first. This already suggests there could be some form of barrier preventing people with following through the adoption process.

Q4. If you were looking to adopt a cat or dog, what are you most likely to do first?
I’d look online – 76.47%
I’d look at a newspaper or magazine – 0.00%
I’d visit a shelter – 11.76%
I’d call a shelter – 5.88%
I’d look on social media – 5.88%
Q5. If you were looking to purchase a cat or dog, what are you most likely to do first?
I’d look online – 58.82%
I’d look at a newspaper or magazine – 11.76%
I’d visit a breeder – 11.76%
I’d call a breeder – 17.65%
I’d look on social media – 11.76%
These next responses add value to RescueLife as the majority of people looking for pet whether thats to adopt or to buy look online first. With some start up budget allocated to SEO I’m confident that RescueLife could appear at or near the top of a lot of pet related searches, especially if I included some sort of blog or informational pages which is a marketing tactic to raise engagement and boost SEO that I learnt during my placement year (blog examples from placement). I was also interested to see that there is a slight difference in approach in buying and adopting, my sample are more inclined to call or visit a breeder directly than call or visit a rescue shelter, this could be that they are familiar with some breeders already but its not a surprise that breeders could generally be more welcoming then rescue shelters which can sometimes be a stressful or upsetting experience.

Q6.
Question 6 provided some very interesting insights into why people consider adoption. The most popular reason to adopt, by a long way, was that it is morally fulfilling. This is definitely that I could use and a design influence. If morality is what convinces people to adopt in my site I can play off this and stress how rewarding adopting a pet is. Despite originally planning on using imagery with no people in, perhaps in certain areas of my site I could include people interacting with their pet in a positive and rewarding way, this would work in the social media portion of the site really well. I also like the idea of having some distinction between the rescue pet finder and the social media parts of the application, I experimented a bit with colour but imagery styles could also work nicely.
The second most popular advantage of adoption was that fact is affordable. Although I have decided to not manage any of the adoption process besides the matching up which includes any payments, this data can still influence my application. I considered including charity donations on the platform. I wanted to have some element of user influence on which charities get promotes each week, or perhaps a dashboard of that months stats e.g new pets, pets adopted etc perhaps i could incorporate most donations and least donations to encourage more.
The least popular answer was that the adoption process can be easy, understandably adoption can take a long time there are logistic to manage and lots of moving parts such as home visits and compatibility checks. RescueLife can definitely flourish there, the whole concept is designed to make parts of the process easier. It would take much extra work to have some standardised home check assessment which can be completed by the users nearest rescue shelter. Once the users passes, it can be saved on their account for an appropriate amount of time if they move. This would potentially save shelter some serious time and money.
Q7.
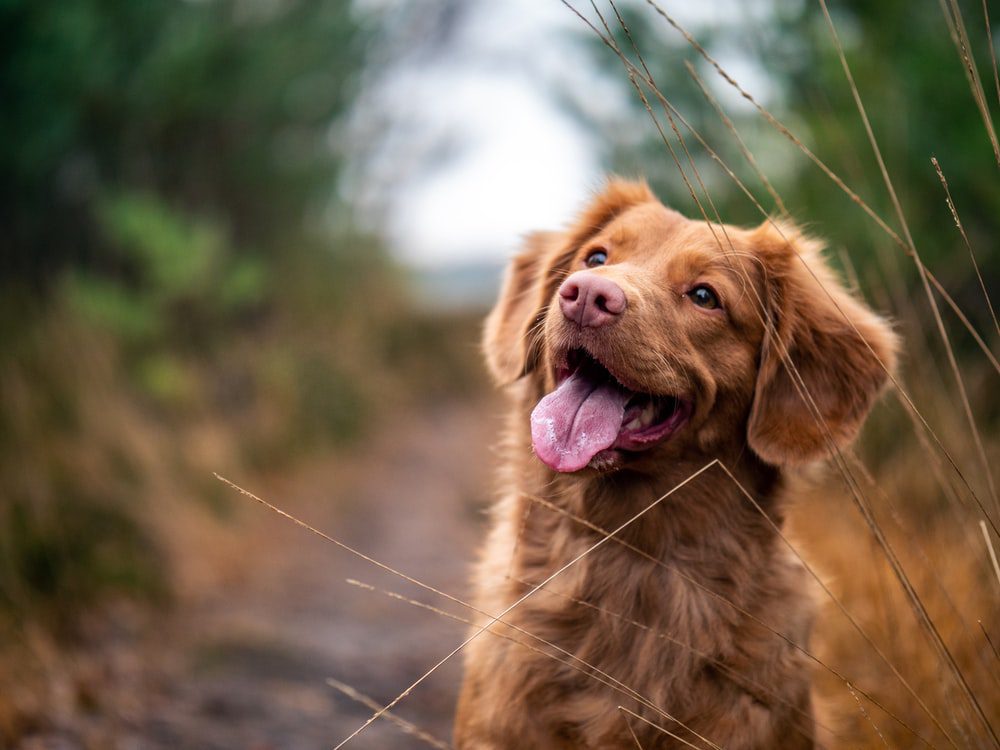
Question 7 was the alternative to question 6 asking about the advantages of purchasing a pet. Again there was one very clear most popular response which was purchasing a dog can be specific (breed, age, sex, temperament) this is very true it is much easier to buy a very specific breed if cat or dog. However this is something I am apprehensive to tackle with RescueLife and I believe this desire to get a pure breed dog is a social problem. I do believe there are benefits to getting a pure bred dog. There are dog lovers who are fan of specific breeds who have experience or knowledge. Buying healthy pure bred version of the breed makes sense, especially if they don’t often appear in shelters due to rarity and smaller demand. Some examples of breeds like this are the Eurasier and the Nova Scotia Duck Tolling Retriever who have dedicated protective breeder that do everything they can to keep them out of shelters. However, the alternative and more common reason for people to buy purebred is due to social influence. Popular dogs breeds are both very overbred and can be very expensive. A lot of which end up in shelters, and when trends change they get left behind.
According to Katie Avis-Riordan from country living the 5th most common dog breed in rescue shelters is the German Shepard. With a little bit of digging you can clearly see how it got there. In 1908 the breed was first recognised as a breed by The American Kennel Club. In 1913 the first championship was awarded to a German Shepard which initiated its popularity (source) and years later in 2015 it was America’s 2nd most popular dog (source). Unfortunately, due to its popularity German Shepards are such a common puppy mill dog. As a result the genetic quality of these dogs is terrible (source). This is just one example of popularity damaging a breed, but this is a constant issue with breed popularity, seen more severely in the degeneration of currently popular flat faced dog and cat breeds.
Because of the complexity of this issue at the initial stages of RescueLife I don’t think adding extra design or certain features would necessarily help. The concept of RescueLife it to promote and shed a new light on rescue pets and this is the best way I can improve the situation.

the breed is afflicted with approximately 50 hereditary diseases. Seven major diseases afflicting the GSD (German Shepard Dog) are described herein: pancreatic acinar atrophy, megaesophagus, hip dysplasia, degenerative myelopathy, hemophilia A, von Willebrand disease, and hereditary multifocal renal cystadenocarcinoma and nodular dermatofibrosis. Also included is a discussion of behavior, a characteristic thought to be inherited in the dog and often problematic in larger breeds such as the GSD
(source)


Q8. Are you familiar with the term ‘Puppy Mill’?
Yes – 70.59%
No – 29.41%
Q9. Are you familiar with the term ‘Backyard Breeder’?
Yes – 70.59%
No – 29.41%
Q10. If you were purchasing a dog, are you confident you could tell if it was from a puppy mill?
Definitely would – 23.53%
Probably would – 47.06%
Probably would not – 5.88%
Definitely would not – 23.53%
In questions 8, 9 and 10 I was interested to see what current understanding my survey sample had around breeder related topics. the majority of people knew what backyard breeding and puppy mills are. This gives me a good indication about how to approach my audience, as the majority know about theses issues I don’t need to have very prominent definitions and descriptions on my site, I can include some extra information for those who would be interested in seeking it out, but at the forefront I don’t want RescueLife to come across too much as an educational platform. Especially as there are so many different opinions surrounding the topics of getting a pet it would be difficult to get the right view and could but people off the platform who have brought pets in the past. This is the last thing I want to do. It is important to me that RescueLife is an inviting platform, with is main purpose to improve the process of rehoming rescue pets.

Developing designs
For my second round of designs I wanted to keep them simple as I knew they would be feeding into my development work and due to time pressure I didn’t want to create really complex design which could slow down my code. I new I would be doing more rounds of development later on so these designs needed to be the building blocks for the future design and development.
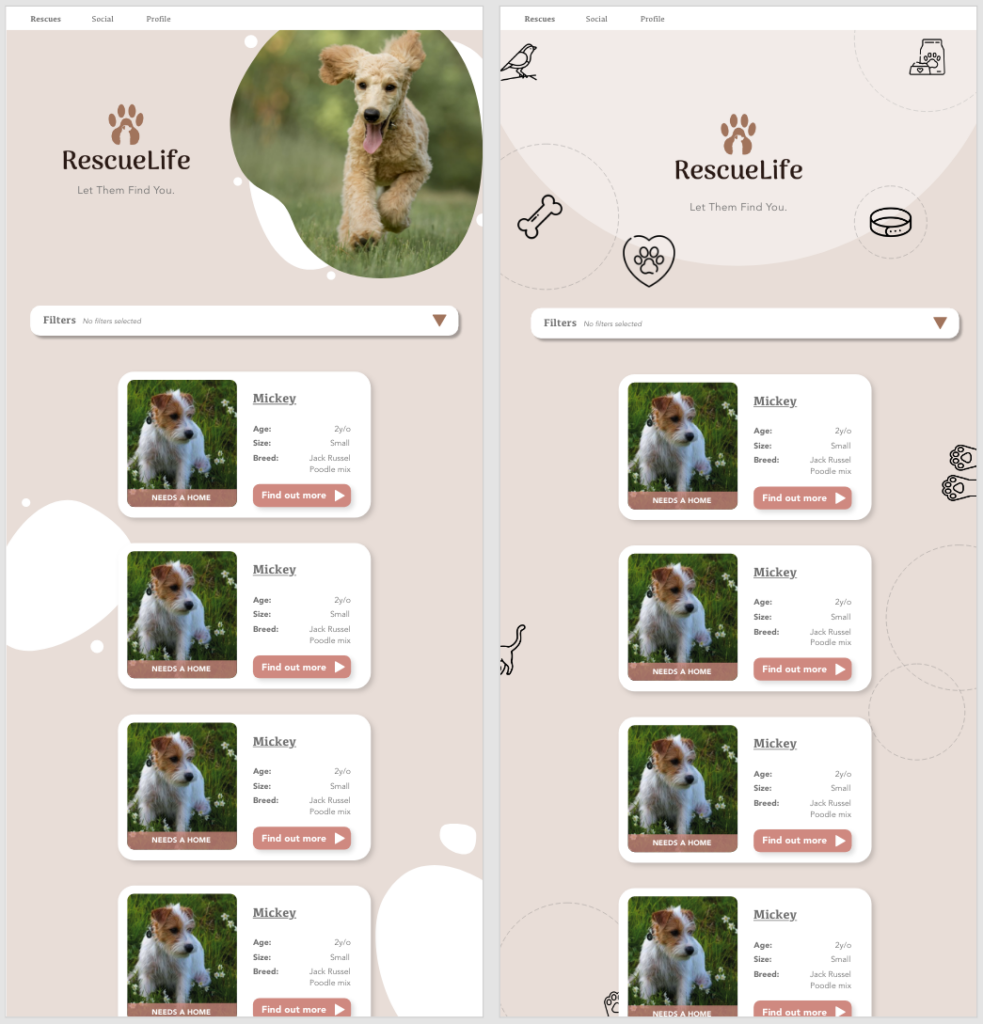
I decided to go with the big header image of a pet. Immediately the user is seeing some appealing and potentially exactly what they have been looking for. It is welcoming and aesthetic so it is a good start the to site. I decided to arrange the content in columns so the user could see three in a row. I like the simplicity of the layout and the information provided in to the point, just enough detail, but not too overwhelming.
Image selection
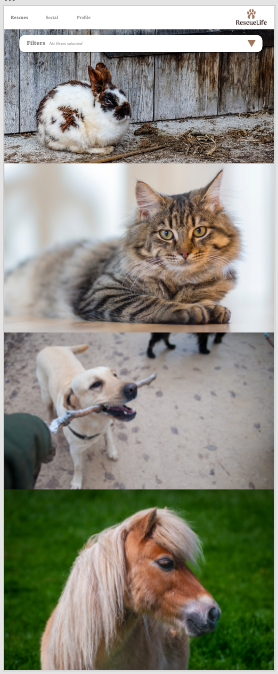
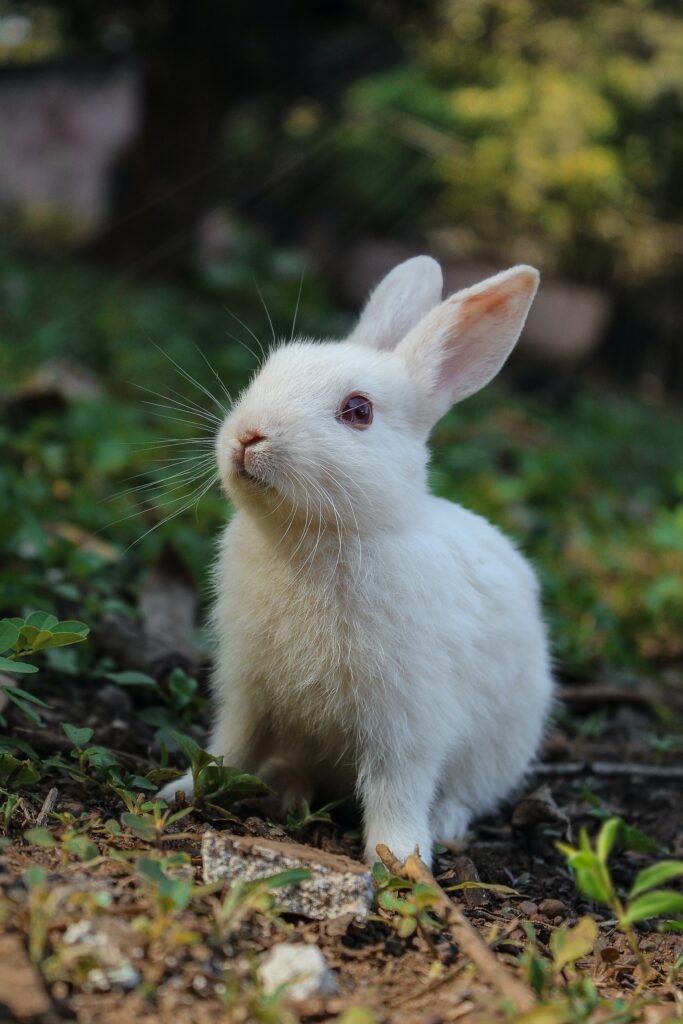
As this design is based on a large header images I wanted to find a variety of images that would work in this situation. I looked on pexels which provides unlicensed images and found a really good selection. I discussed previously that I wanted to use a specific style of image, colourful, vibrant action shots, a scenario a user could image themselves in. All these images I found worked perfectly. The shots themselves where take beautifully really capturing a snapshot in the lives of these pets. All the images are taken in relatable scenarios, dogs on a walk, cat snuggled in a blanked, rabbits in a hutch and a horse in a field. Yet they really allow you to appreciate the beauty in both the animal and their surrounds. The backgrounds alone would make amazing images but with the addition of a pet, they are made that much better. What also works so well in that all the images are neutral tones, there are no bright or artificial colours which would stand out and through of the theme, they all work really well together as a collection.


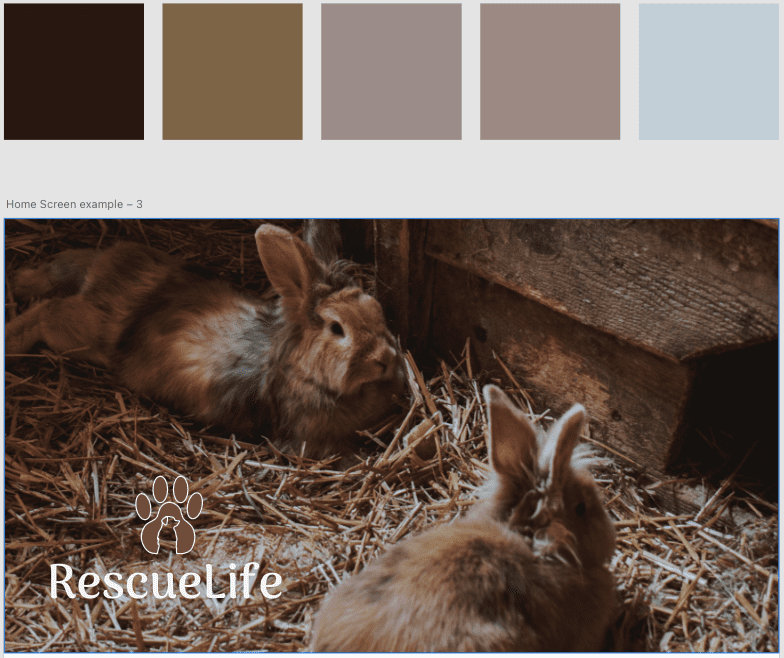


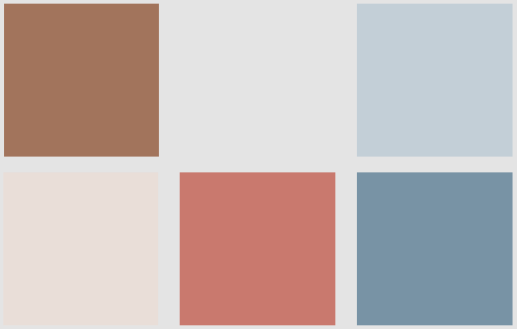
Colour scheme
I used these images to help me decide on a colour scheme. I wanted to use more natural colours as this would better compliment the animals on the site. As the images above already had some really beautiful tones and colours I used a colour picker to construct a theme for each one as seen above. I had already created my own basic theme using coolours as seen on the left, where I had followed the idea of using neutral and natural colours. However I decided that all the colours where too simalar and it gave me very little to work with drawing inspiration from both this original theme and the images I constructed a new scheme. I also added some additional colours for accent such as links and content distinction. At this point I also updated my logo to the new colours.

I designed this simple filter panel to allow users to filter the pets displayed to them. I wanted the buttons to be easily understood so I designed them to have a switch. I wanted the switches to have clear indication on weather they where on or off so when switched on I included some text. However I feel like the text is a bit small and I am not sure it serves its purpose if it can’t be read.


This next page is the social page, it will consist of all the new posts / updates from accounts a user is following. this was my initial concept for the page layout. I did find it difficult to display the content without the page feeling too cluttered. I wanted the images to have a timeline display, but I also wanted to display some additional information about the pet. At this stage I was also testing out a potential ‘like’ button. Instead of using a traditional heart or thumbs-up I wanted to use something more on theme so I liked the idea of using a bone outline. This however doesn’t work so well for a cat or a horse so it in future versions of the app perhaps they could have specific shapes relevant to the type of pet. This however, is not functionally I would be focusing on in my demo version of the application due to the time constraints I was to focus of creating a few scripts to ru through to demonstrate the main functionality.
I do like the images being the main focus of the page however I think the image off to the side should be faded a bit and they are just a suggestion of another images that could be clicked on to view in full. However I’m not sure that in its current state the suggestion that the timeline can be navigated is obvious enough, I think the addition of buttons would emphasise this much more.
I did consider allowing users to comment of posts but I didn’t design that in here. Although I want RescueLife to feel interactive and build a strong community of pet lovers. Allowing comments then requires moderation and rules about what can be said, At this stage of the application those features aren’t viable but are definitely a future consideration.
This layout is a profile page from the perspective of another user. I used simalar design from the social page as I wanted there to be consistency with the layout. The profile page is what users click through to when selecting a pet. For a while I did debate weather or not I wanted the pets to have their own profile page or just a user profile page displaying all the pets they own. I ultimately decided to keep the structure simpler and just have 1 profile page for each user containing all the pets they own. I added a little more information about each pet which can be edited by the user. I also felt it was important to include the date of when the image was uploaded to give more sense of a timeline. The ‘pet pals’ button was my idea of ‘followers / friends’ as they are often know as of different social media platforms. In this design a user follows the individual pet rather than the person.

This design is for the rescue shelters. I have thought about whether they should have separate account types and this would make sense. I would limit rescue shelters to be the accounts which could upload new rescues available for adoption and I want to be careful to avoid backyard breeders or puppy mills using the platform to sell pets. I would have a admin account that would verify if the rescue shelter was legitimate by checking their charity number and possibly a simple background check ( in person visit / video call ). However for purpose of the demo application I will keep it to just one type of account for simplicity.
Image upload
My next steps in the demo site development were to get images uploading to and from the database. Due to they way mongoDB works you can’t upload images directly you have to save them in a folder and upload a path to that image to the website. There was an example on the DLE of how to get this functionality working. To upload the files I had to install Multer which is a middleware component on npm. This allows you to upload a multipart form which is a form the consists of a variety of uploads such as text and files.
I was able follow the tutorial and get images uploading to my site without much issue. Next I had to integrate this into my current code, so you could upload an image as part of the form when entering a new pet. This did take a bit of trial and error but eventually I got that working.
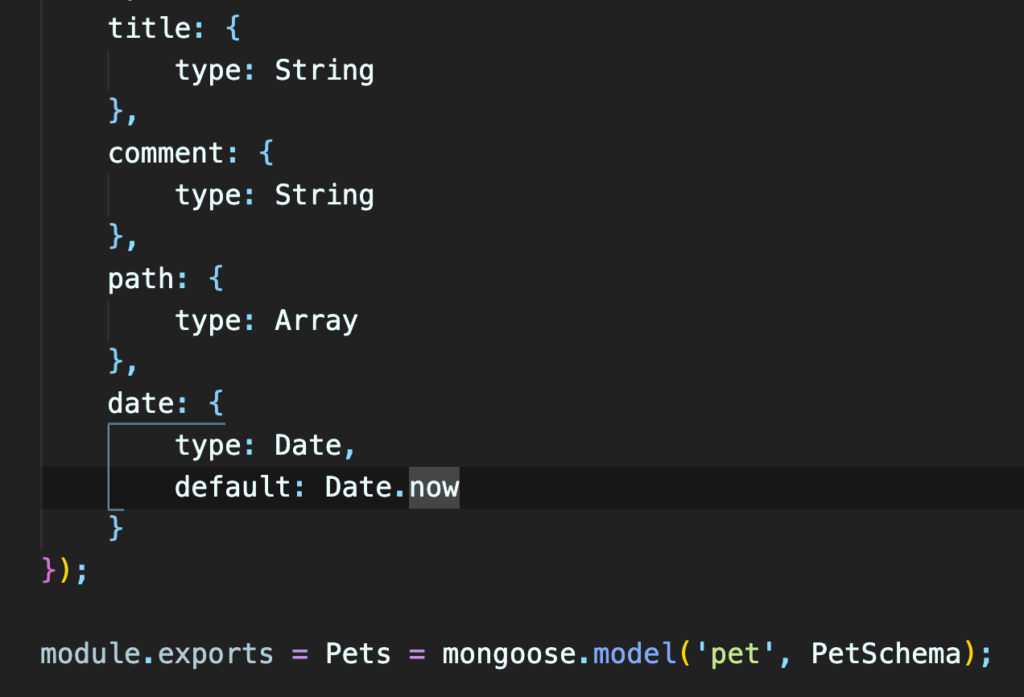
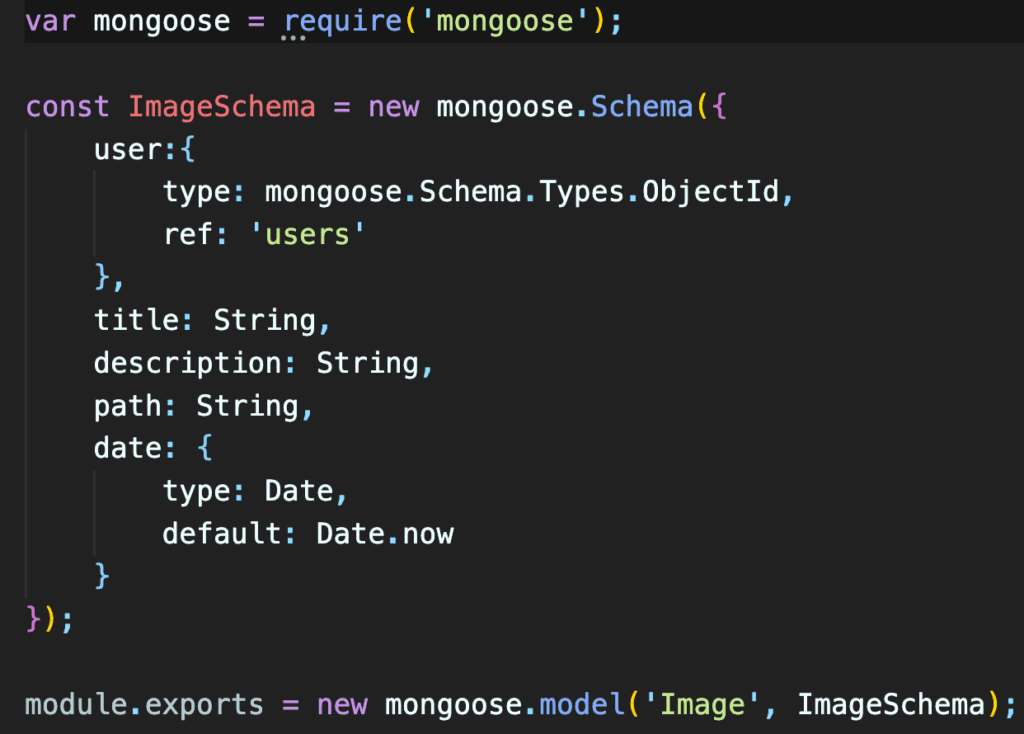

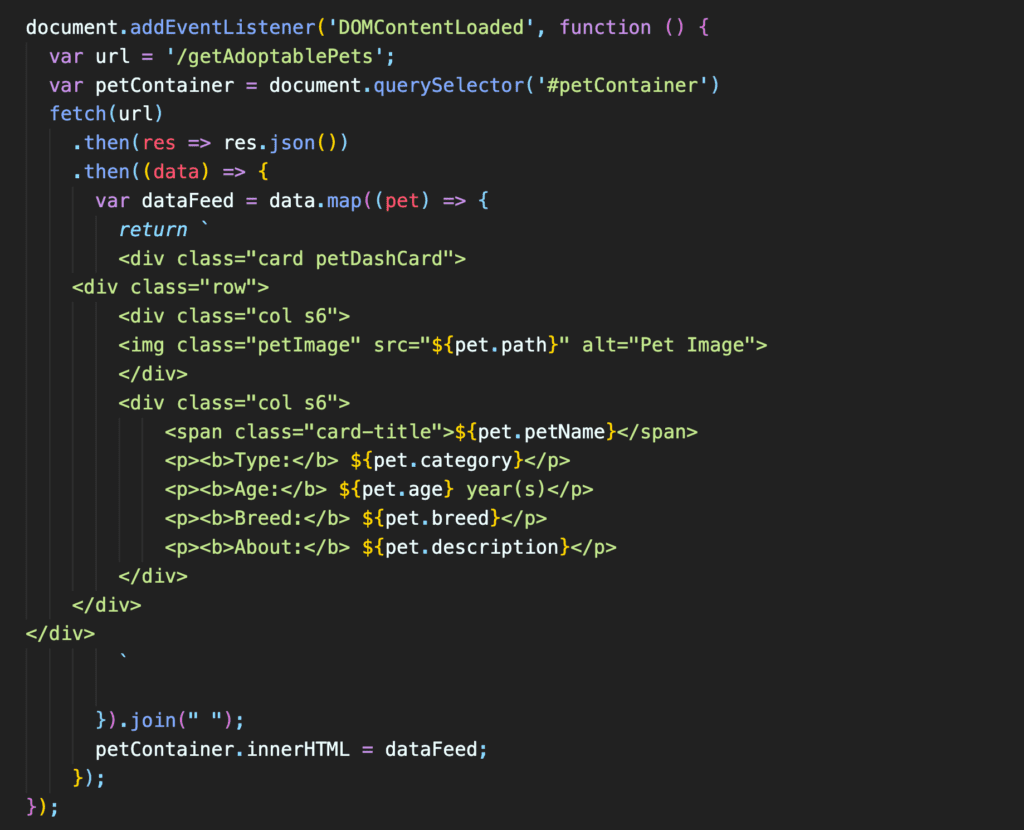
Image display
Once I had got the images uploading to the database I needed to display them in the code. This is possible through the script.js file where I could could create some html to display the images along side the content. This did cause me some problems as the code is cycled through for the amount of pet entries there are in the database. Here I was specifically displaying the adoptable pet which I had defined in the server.js file when calling the data. The issue I ran into was whether to code the html in the js file or the hbs file. I felt the content was less maneuverable in the js file but it worked better in the js file due to the way its cycled though each pet entry. For example I couldn’t create a row of entires as every entry would be on the same row which didn’t look good in the browser window. For this reason I decided to stack the entires in a list, I actually prefer this approach as it looked neater and allowed me more space for each pet with a larger image. In my previous design all the content spanned the width of the screen which isn’t the best design practice, especially for larger screens. Therefore I preferred the new version and will incorporate it into future designs.
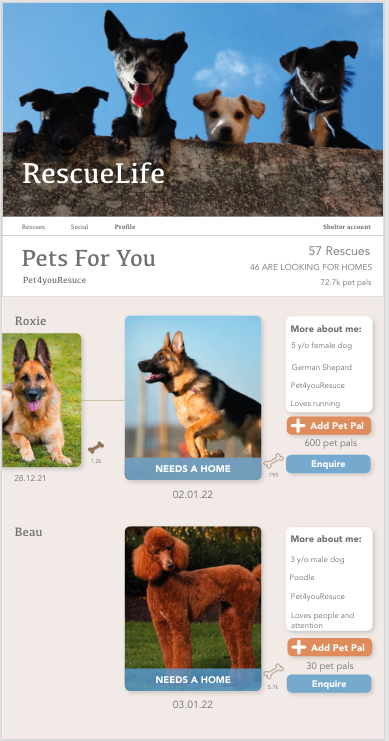
Rescue page
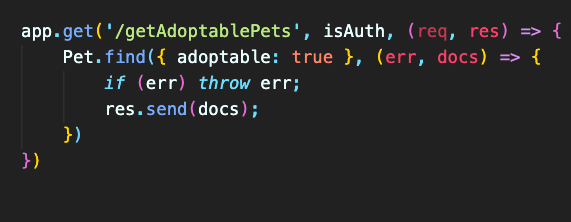
I first page I created was the rescue page. This is designed to show all the adoptable pets that where currently available. To do this I had to query the database with all the pets that matched with “Adoptable = true” after some trial and error I succeeded and I could then manipulate the data in my script and hbs files for the data to be presentable and easily interpreted by the user.
Here is an example of the layout of an adoptable pet. As I have mentioned previously I wanted to keep the design simple without too much text. I feel this amount of text provides a necessary amount of information without being too much too read. An issue that I had no considered was that the uploaded images would be all different sizes and shapes. However as they are displayed in the cards I still think the design looks presentable and I don’t want to put restrictions on image dimensions as I want to upload processes to be as simple as possible for the benefit of result shelters how would have to upload a lot of pet. My other option was to crop the images to size once uploaded. This is a more viable option, but my concern is that it would definitely limit the range of images on the site. Instead I thought the best approach was to vertically align the image to the centre to look more intentional.

Final Designs
After creating the basis of my website I decided to go back to the design stages to improve and develop my existing designs. At this stage I could add more detail and functionality as I wouldn’t be basing my code of this a much. I really wanted to add some character to the application as the first designs, were functional they lacked a bit of flare. I added a large paw-print, the same design I created for my logo, to the background which instantly gave a bit more depth to the site. I decided to create this simple into page for users who have perhaps not made an account but are curious about what rescueLife has to offer. I feel like this design is far more engaging and interesting than my initial concepts. As I was pleased with how this turned out, I wanted to continue it over to the rest of the pages.
Content Layout
Another significant change I made to this new design was the content layout. I decided that the content depended on the context of where it was and the help me decide how much to display. These 3 cards are the different content layouts. The first is the content for the rescue feed, this requires a decent bit of information, but not too much that it can’t be easily skimmed over. The second image is in the social feed, This requires the least amount of information as users would be following these pets. Just a sentence to accompany the image works well. The the final image is the profile page, requiring the most amount of information. This is where a user will look if the are interested about a pet. Therefore all the information available needs to be provided. I displayed the text under the images so no matter how much text was there it always has space.


Mobile Prototypes
I designed some simple mobile versions of the application as in future I would make the design responsive as a portion of it is a social media which are most commonly used on the phone. These are some examples what the application would look like. The first 2 images are the rescue feed. I didn’t want to break up tot content too much and I wanted the users to be able to easily see the images and text in one go. I decided to add a swipe feature to ensure that was possible (this can be tested on the adobe final project link).
These second set of images are representing the social feed and a profile, I kept a long of the content layout the same just adjusting the size and navigation. I probably would change the navigation to icons in the future but as this is a simple concept they work with just the words. Especially as creating an icon for rescues would be difficult to make clearly interpretable.
Final Designs – Form
I also wanted to change to form a bit in both design and function. Although my code will remain with the old design I felt it was important to not let that stop me from improving the design. I sectioned the form out in a variety of way to make it easier for the user. Firstly in my design I changed the form into four forms rather than one, all similar in concept but they refer to the different categories of pets. I thought this was important because having one form to describe both a cat and a fish felt too vague. To give the animals the best chance at getting adopted and the users the necessary and specific data they need it made sense to separate out the forms and tailor them to their animal category.
I also made the form appearance much nicer and more manageable. The user is only presented with a few fields and a time. They can complete them and then move on to the next section. From the user’s perspective this is a lot less overwhelming than being faced a large quantity of inputs all in one go. I also include a preview at the end so the user could see how the profile would be displayed and they are able to go back and change it as much as possible.

Full prototypes
Please see my full prototypes here:
Design process: https://xd.adobe.com/view/ca5ef0e1-8472-4d31-b3de-17f0e4bec864-9f0d/screen/f222c841-b21c-4447-b5dd-e5d51ed4080b
Final Designs: https://xd.adobe.com/view/da786297-e749-4ac3-af55-06faeb95e22b-8f2b/

My profile
The next page I coded was the logged in users profile. Similar to the rescue page I had to query the data base to return all the data on the pets uploaded by the specific user that is logged in. This also had the added complexity of initially being the template for all the profile pages for other accounts. However after struggling to make that work I decided it made better sense to separate them, and have a user profile and a profile template which can be populated with other users data when viewing other profiles. Simplifying this page to just use the user profile made it much easier to create. I just had to query the database for all pets with the user value equal to the user value of the current logged in user and then display that data like in the previous page.
User profile
Then my task was to generate other profiles by populating the user template with data from the database. This was very challenging as I needed the images on the explore pages to be links while also using the images associated data. After a lot of trial and error and many discussions with Chris we managed to get it working. A user could access the explore page and browse through all the pets on the site. They could click on any one and that would generate profile page for the user associated with that pet and the users other pets.

Multiple image upload
Another important part of the functionality was image upload and slider display. Uploading one image was fairly straight forward, but uploading multiple was a bit more of a challenge as I had to send an array to the data base instead of just one string. This require a bit of js on the server.js to prepare the array it also required to to update the schema and form to cater for multiple images. Once the multiple image upload was working I had to display these images as a slider on the generated user profile pages. Initially I looked into owl carousel but this caused more problems so instead I used swiper.js which fitted into my existed code and design just as hoped.
filters
Unfortunately I was not able to get all aspects of my code working. There were some parts I was keen to have a go at but as a lot of the functionality took me longer than expected some things were left out. I couldn’t get the filters working on the dashboard to organise the pets that appeared there, I did managed to get the filters to response to if they where on or off which displays in the console.log, but applying that to the displayed images was harder than expected and not my priority in the functionality.

The future of resueLife
I wanted to consider the real-life feasibility of this project. There is real potential for it to be successful in the aim of simplifying the process of finding a rescue pet and encouraging more people to adopt. There are some features I would add, with more time and resources, to improve the application before deployment. Creating two account types and a method to verify rescue shelters as I want to prevent users from uploading ‘adoptable’ pets with a significant adoption fee under the false pretence of a charity but, in reality, being puppy mills or back yard breeder attempting to sell of their produce. Therefore, ensuring charities are genuine by checking their charity number and potentially a simple background check would ensure all my users were safe from deception. I would also implement a blog of updates and information to offer my users as well as boost the websites search engine optimization (SEO). Post deployment I would consider including features that would benefit all users, such as a ‘home visit’ approval status on user profiles. Many rescue shelters require a potential adopter to have a home visit to ensure their home is appropriate to take on a pet (Adoption Procedure, 2022). However, this is required at most rescue shelters, to save the shelters time and money home visit statuses could be uploaded to the user’s profile and if for example and user passes a home visit but does not receive the pet, they don’t have to complete another home visit within a specific time frame or if their circumstances change.
In terms of functionality, I would ensure the developed version matched the designs I had created. I would alter the code slightly to make it better work for the future development. For example, currently when a user uploads an image, it, along with all the other images, is saved to an uploads folder. I would change this to having a specific folder for every user account, this added sophistication would make handling the images in the front end easier and would help with problems such as the filters not working.
In order for RescueLife to be a viable business it would have to generate income. Monetisation would be plausible with advertising and brand deals with pet related products. My current designs include adverts of pets in need of adoption or success stories. These locations are where external adverts would go to generate some income. I envisioned a certain percentage of all profits being donated to small-scale rescue shelters monthly which could be determined through the users on the social platform to boost engagement and provide a sense of community and evolvement through competitions or voting. RescueLife would hopefully establish itself in the rescue pet community and with strong enough uptake partnerships with pet brands in the pet food or pet toy sector would provide solid income. These brands would also likely be interested in my user data which is another potential income stream if necessary. When considering monetisation, I was keen to stay away from offering RescueLife as a paid service for both the user and rescue shelter side or taking a per cent of adoption fees, as this would turn away many customers and be another barrier in the pet adoption process which RescueLife is trying to avoid.
Conclusion
Unfortunately I was not able to get all aspects of my code working. There were some parts I was keen to have a go at but as a lot of the functionality took me longer than expected some things were left out. I couldn’t get the
RescueLife was easily the most challenging project I have taken on. The application provides a solution to a topic I am passionate about. I am confident that RescueLife solves the issue it set out to, and I am proud of what I have produced and what I have learnt during the process.
I really stretched my ability with the development and thoroughly enjoyed the design process. At the start of this project, I was optimistic about how much I could achieve in the time scale. I soon realised that my ambition with the development aspect of the project, in some areas where a little far-fetched. However, despite concluding this project without a fully developed, hosted product with an extensive user uptake, I am incredibly please with what I have achieved. This project has definitely highlighted my passion for all aspects of design and how they feed into the development stages, my confidence in working with HTML and CSS have increased and I untimely feel in very strong position to enter the world of work.